CONTENTS
- Case Contents
- Connect with the Loxone App
- First steps in Loxone Config
- Enabling online services
- VIDEO: Loxone Demo Case: An Overview
- More Information
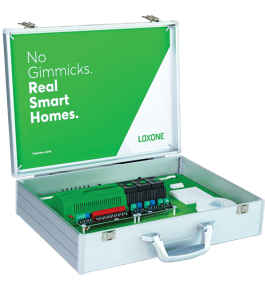
CASE CONTENTS
Inside the box:
- Information sheets
- USB Drive (including with link to Config software downloads and a copy of the current configuration on the Demo Case)
- Power adaptor
- Miniserver, Extensions and Accessories
- Router
CONNECT WITH THE LOXONE APP
1. PLUG IN AND GET STARTED
Take the supplied power adaptor (you’ll find it in the white box beneath the cover) and connect it to the case (there is a connector on the back of the case for this), then plug it into a socket. When the Miniserver and Extension LEDs begin to flash green you’ll know that your Miniserver and Extensions are ready to go! While the system is booting up, why not take this time to download the Loxone App for FREE on your Windows, Android or Apple App store? Application Downloads
2. CONNECT WIRELESSLY
Next, you need to connect your smartphone or tablet to the case. The Loxone Demo Case has its own inbuilt home network and will now be broadcasting a WiFi for you to connect to. Using your mobile device search for the network created by your case. The WiFi name (SSID) will be the same as the number underneath the barcode on the sticker inside your case in the bottom left-hand corner. 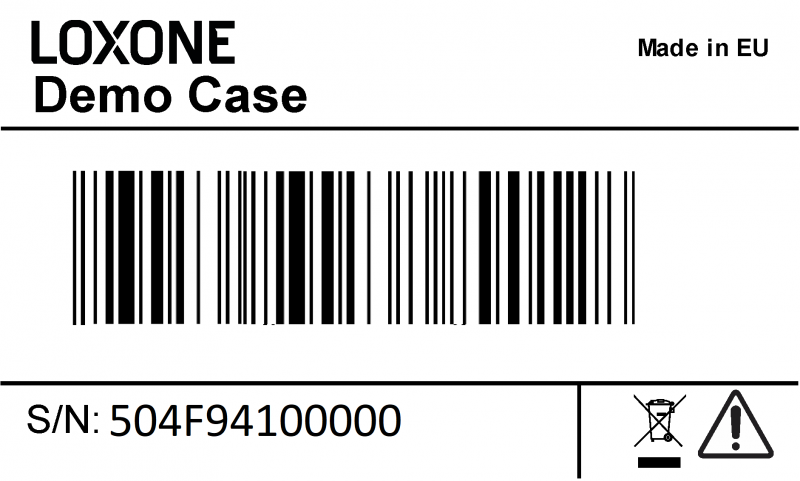
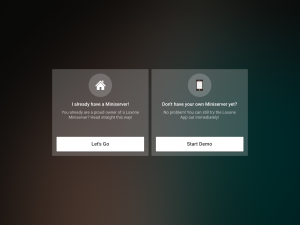
3. CONTROL YOUR DEMO CASE WITH A SMARTPHONE OR BROWSER
- Open your newly downloaded Loxone App.
- Tap ‘Let’s Go’
- Tap the ‘plus’ button and then ‘Search’
- Select the Miniserver that shows & login with the credentials
- Username – admin
- Password – admin
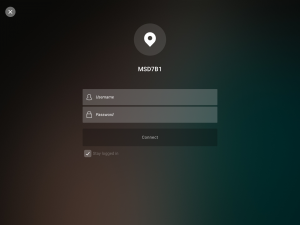
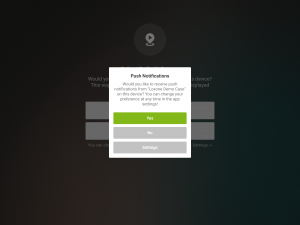
- You will then get prompted to decide if you would like to register for Push Notifications, as the Demo Case does not have an internet connection select “No“.
Now you can control your demo case from your Smartphone or iPad!
APP First Look
 1. Miniserver Settings 2. Loxone Functions page 3. Loxone Central page 4. Rooms 5. Categories
Rooms & Categories First Look
1. Rooms 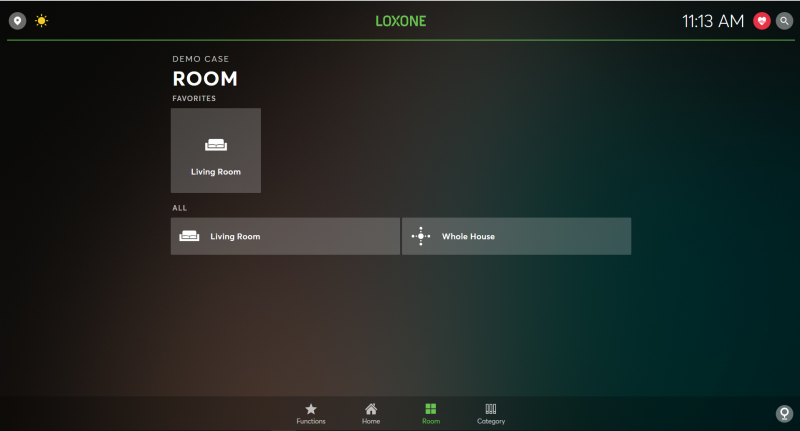 By tapping ‘ROOM’ at the bottom of the screen, you will see each individual room available to you on the screen. You will be able to view all available functions and features of that room after selecting it here. 2. Categories
 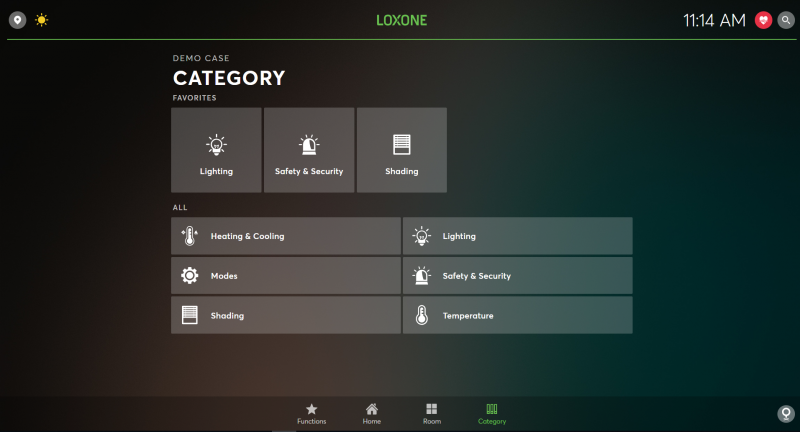 By tapping ‘CATEGORY’ at the bottom of the screen, you will see each individual category type. By selecting any of the categories, i.e Lighting; the screen will change to show you all available Lighting functions in the house. Application Downloads
FIRST STEPS IN LOXONE CONFIG
1. DOWNLOAD AND INSTALL LOXONE CONFIG
If you’ve not already done so, download and install the latest version of the Loxone Config (our free configuration software that allows you to set all functions of the Miniserver). Click here for quick access to our downloads page. ![]() If you are using an Apple Mac computer & the Parallels virtual machine software, you will need to bridge the network adaptor in the Parallels software settings. More information regarding this can be found on the Parallels support page.
If you are using an Apple Mac computer & the Parallels virtual machine software, you will need to bridge the network adaptor in the Parallels software settings. More information regarding this can be found on the Parallels support page.
2. SEARCH FOR THE MINISERVER & CONNECT
- Once you have installed Loxone Config software on your Windows computer you can now get started. If you own a Mac, you can run Loxone Config on a virtual machine (such as Parallels)
- Connect your laptop/computer to the Demo Case WiFi network (exactly the same as you did with your phone/tablet earlier)
- When you get a purple popup from the right-hand side of your screen asking “Would you like to view network devices on this public network” – > Ensure you click YES
Now open the Loxone Config software and click on ‘Search’ under ‘Miniserver’ in the left-hand sidebar. The Miniserver in your Demo Case will be listed in the search results. 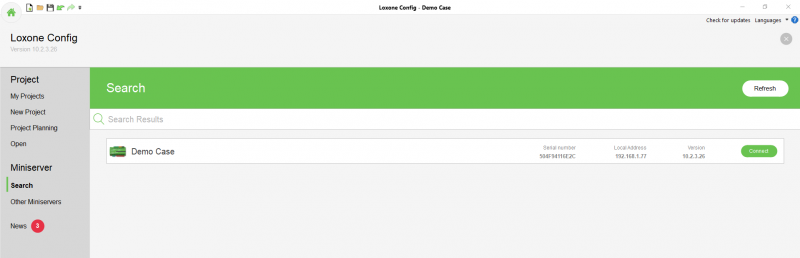 Select the Miniserver by clicking it in the search results and then type in the username and password. The username and password are both “admin”.
 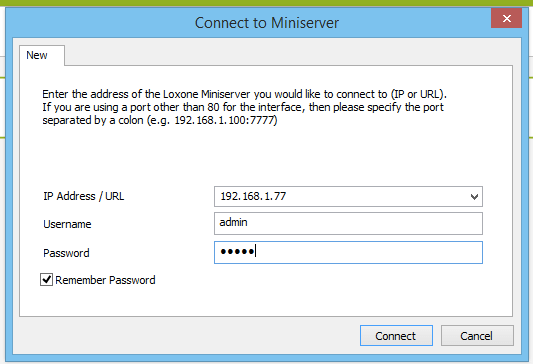 After connecting, the status bar (the yellow bar that stretches across the screen) in your Config software will show a green highlighted “i” on the far left, state the software is connected and the file to your Config program will be loaded out and available on your screen.
 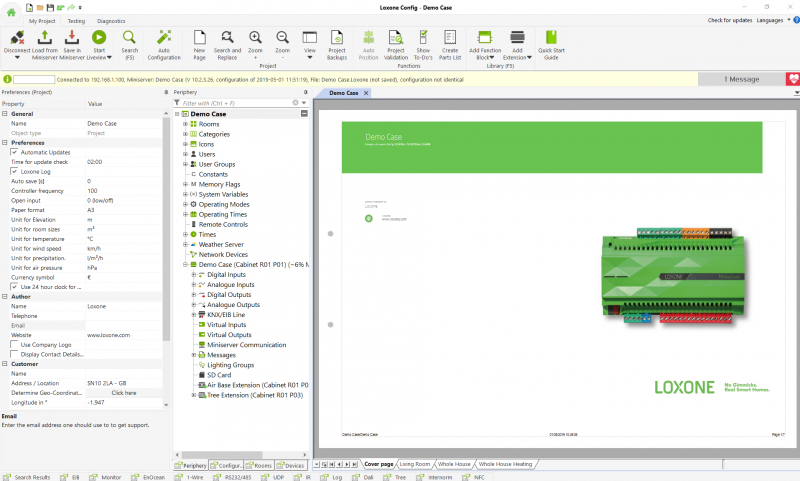 If you are unable to connect please read through our troubleshooting guide on our Miniserver Diagnostics documentation page or contact support on [email protected]. Now you can make changes to the existing configuration. For further information on using Loxone Config have a look at our documentation pages “Auto Configuration” and “How to create logic in Loxone Config” Once you’ve tested your configuration, you can upload it onto your Demo Case Miniserver, by clicking ‘Save in Miniserver’ in the ribbon at the top.
 ![]()
ENABLING ONLINE SERVICES
If you wish to use your Miniserver online you will need to connect it to a network that has an active internet connection.The easiest way to do this is take an ethernet cable plug one end into one of the ethernet ports on the router and the other end replaces the ethernet cable that is already plugged into the top left corner of the Miniserver. Once connected to the internet you must register your Miniserver at www.loxone.com. This will allow you to use the DNS server for remote access and test the Weather Service and Caller Service for 30 Days free and without obligation. Check out the “My Products” section of your account on our website for the information on the Weather/Caller Service free trial. 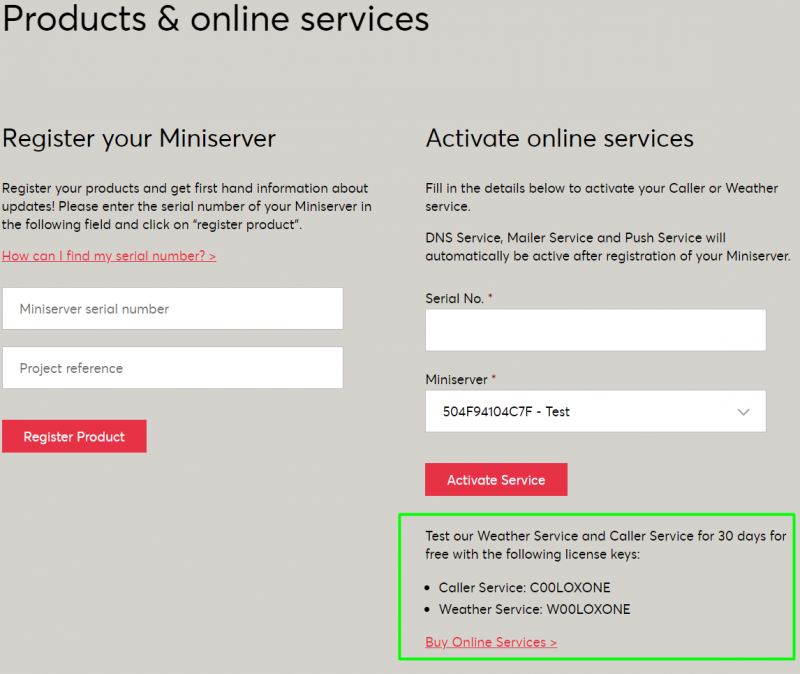 For more information regarding our online services, see our documentation links: Caller Service Weather Service
VIDEO
MORE INFO
Contact us
Download example configurations and see our tutorial videos
Follow our online seminars
Get all the latest news about Loxone and the Miniserver