This allows you to access and operate the Miniserver from anywhere via the Loxone App or the web browser.
Also, configuration via Loxone Config is possible remotely.
Use External Access instead.
Activation
Register your Miniserver (Requires registration via our website)
Perform the initial setup and select a secure password for your user, this is a prerequisite for the use of Remote Connect.
With a new Miniserver, Remote Connect is already set as the external access type at the factory.
If Remote Connect has been deactivated on the miniserver in the meantime, access can be reactivated with the following steps:
Connect to the Miniserver, open Configure Miniserver, and enable Remote Connect:
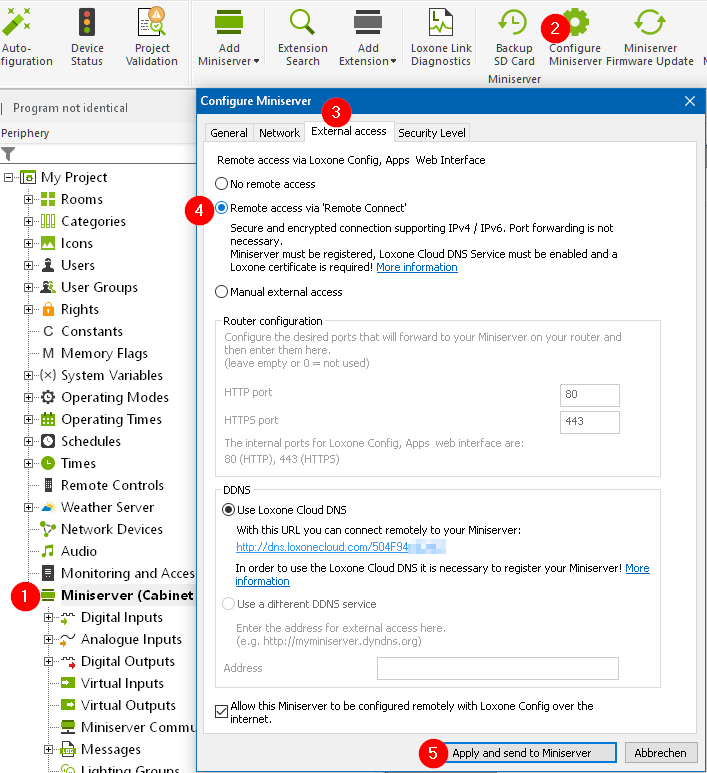
When using “Remote Connect”, “Loxone Cloud DNS” and “Use Loxone Certificate” (in the Security tab) are automatically enabled.
To also enable remote configuration via Loxone Config, enable the option:
Allow this Miniserver to be configured remotely with Loxone Config over the internet.
Finally, click on Apply and send to Miniserver and the Miniserver will reboot.
After a few minutes the Miniserver can be reached from the Internet at an address according to the scheme https://dns.loxonecloud.com/504F94000000.
The latter part of the address is the serial number of your Miniserver.
Access is then encrypted, IPv4 and IPv6 are supported.
If you are using a Miniserver Gen 1, Remote Connect is not available in the configuration dialog.
Technical Data
The Remote Connect service connects via the subdomain *.loxonecloud.com
For a detailed overview of addresses and ports used, see:
Loxone Ports & Domains
Use this information to configure a firewall.
This is not necessary in a typical home network, but may be required in corporate networks.