CONTENTS
GENERAL
- Loxone EIB/KNX IP Gateway
- Search
- Learn Mode
- EIB function blocks in the Configuration Software
- Status feedback
EIB SENSOR
EIB ACTUATORS
![]() In order to program KNX devices remotely, the following port must be forwarded to the Miniserver Gen.1 :
In order to program KNX devices remotely, the following port must be forwarded to the Miniserver Gen.1 :
TCP, UDP 3671
In addition, NAT Mode must be activated in ETS.
An accurate number of required EIB sensors/actuators will vary. The number needed depends on the size of the rest of the program.
GENERAL
Please note that only the Miniserver Gen. 1 supports the EIB/KNX Gateway functionality!
When using the current Miniserver, a KNX Extension and an additional KNX Gateway is needed.
For the KNX bus a separate and product specific power supply needs to be used (the KNX/EIB power supply).
For addressing and configuration of the sensors/actuators a full ETS programming software license is required.
LOXONE EIB/KNX IP GATEWAY
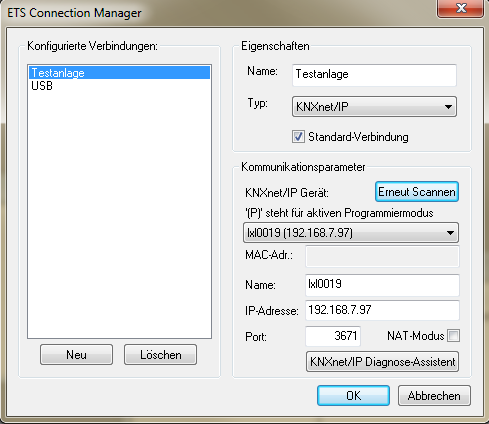
The Loxone Miniserver Gen. 1 acts as a full IP gateway which enables you, for example, to program with ETS directly on the local network.
The Miniserver Gen. 1 is automatically detected by ETS as a gateway. To make this possible the following settings must be set in the ETS Connection Manager.
SEARCH FUNCTION
Clicking on the EIB Search function lists all devices that are configured in the EIB installation.

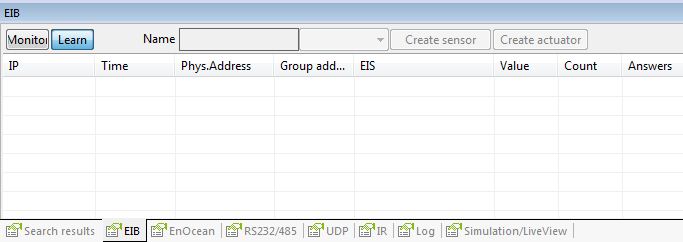
LEARN MODE
To use the EIB Learn Mode, you must first enable the EIB monitor. Do this, then select ‘Learn’ in the EIB window, not ‘Monitor’! You can then quickly and easily insert group addresses for your EIB actuators and sensors.
![]()
In ‘Learn Mode’ you can select the desired group address. They will then be highlighted in blue.
The line in yellow highlights the last switch operated with a group address.
In ‘Name‘, enter the desired name for the push-button. The EIS type is set automatically, but can be changed manually. Finally, select either ‘Create Sensor‘ or ‘Create Actuator‘.
The EIB-Sensor/Actuator is automatically created in the ‘Periphery‘ tree under ‘KNX/EIB line’.
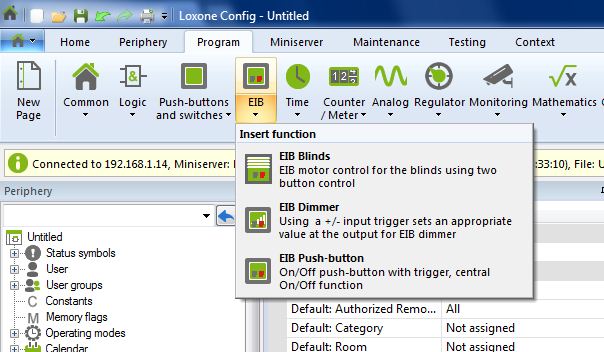
EIB FUNCTION BLOCKS IN THE CONFIGURATION SOFTWARE
For the easiest integration and control of your EIB installation please use the built-in ‘EIB function blocks’ in the configuration software.
Here is an example configuration for lighting and shading using EIB function blocks:
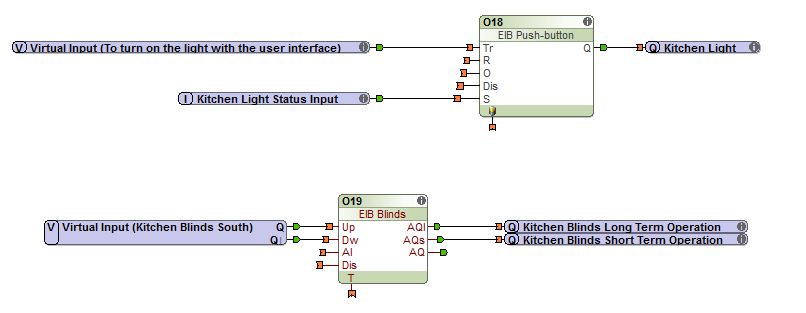
STATUS FEEDBACK
Status feedback is very important for the user interface and the Miniserver, especially when using a Loxone user interface (see specific scenario).
If, for example, you turn on a light not through the user interface, but rather using an EIB push-button on the wall, the Miniserver still detects whether or not the light is on. Likewise, the user interface will display the correct status.
Use an ‘EIB Sensor‘ to return status reports. If the actuator group has its own feedback group address, set the group address of the EIB sensor to match. If the actuator does not have its own feedback group address, please set the sensor to match the address of the actuator.
The screenshot shows a correct status feedback program:

EIB SENSOR
EIB SENSOR
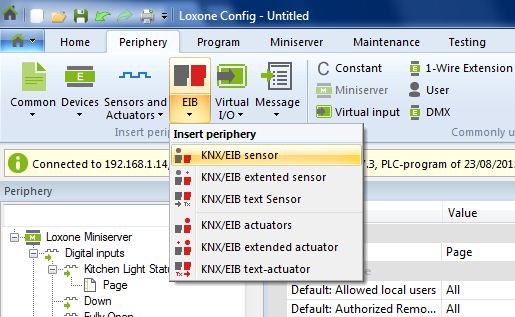
In the ‘Periphery‘ tab, you’ll find: an EIB sensor, EIB Extended Sensor and EIB Text Sensor. Clicking on the desired sensor inserts the sensor into the Periphery tree in the ‘KNX/EIB line’ section.
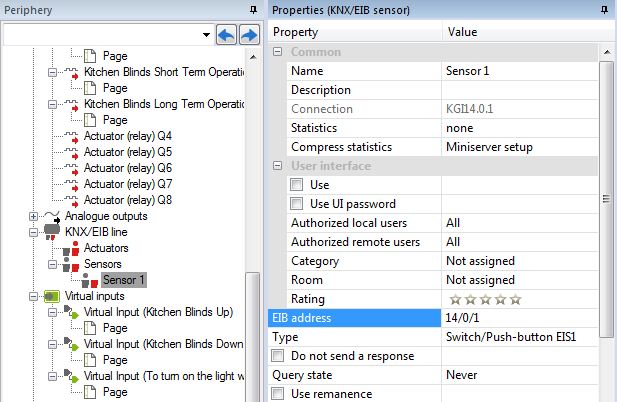
Clicking on Sensor1 opens the ‘Properties‘ window for that sensor. Here you can set various parameters, including group address and EIS-Type. If you enable the option ‘Do not send a response‘, the Miniserver will not send acknowledgements (no EIB confirmation). In ‘Query Status‘ , you can set the cycle during which a query is sent . Use ‘Query Status’ sparingly, as it places an unnecessary load on the EIB-bus . If ‘Use Remanence‘ is enabled, then the last active state is restored, for example in the event of a power failure.
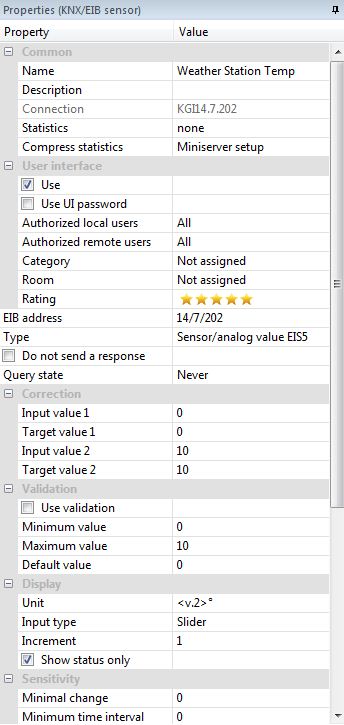
EXAMPLE: READING A TEMPERATURE VALUE
Here is an example of an EIB weather station and corresponding temperature value as seen in the Configuration Software and user interface logic.
Please be sure to configure the ETS sending parameters for the reading.
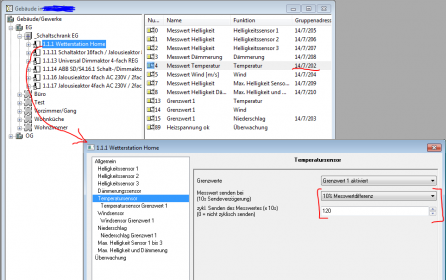
In the Properties window of the temperature sensor, set Type to ‘Sensor/Analogue value EIS5‘. Setting up the user interface is then just a few mouse clicks away – this screen shot shows the recommended settings:
EIB EXTENDED SENSOR
80% of the time you will be using a simple EIB Sensor. However, in some special cases ‘EIB Advanced Sensor’ may be required. For example, if you cannot configure your EIB switch to produce a 1 when activated and a 0 when released. Another example: you are planning to integrate a Miniserver into an existing installation. You don’t want to change anything and you’d like to retain certain existing sensors/push-buttons (for whatever reason). EIB Advanced Sensor, would allow you to completely integrate a previously configured ‘Dimmer’.
![]() In the Properties window of a sensor, the group address can be set to ‘EIB Addresses ON‘, ‘EIB Addresses OFF’, and ‘EIB Addresses Pulse’. Furthermore, you can specify the value sent by each corresponding option.
In the Properties window of a sensor, the group address can be set to ‘EIB Addresses ON‘, ‘EIB Addresses OFF’, and ‘EIB Addresses Pulse’. Furthermore, you can specify the value sent by each corresponding option.
For example if this push-button is pressed, the value ‘9‘ is sent to group address 14/1/5. Releasing the push-button sends the value ‘0’ to the same address group. With a short-press/pulse, the value ‘1‘ is sent to the group address 14/1/4.
| EIB addresses On | 14/1/5:9 |
| EIB addresses Off | 14/1/5:0 |
| EIB addresses Pulse | 14/1/4:1 |
EIB PUSH-BUTTON CONFIGURATION WITH EXTENDED SENSOR
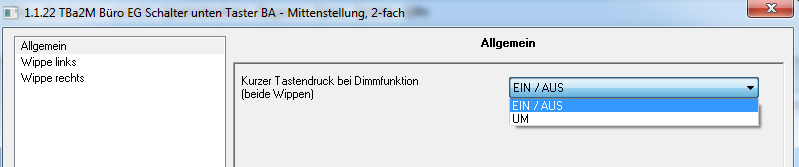
In the following example we focus in detail on an EIB push-button that was configured for dimming and has only limited settings in ETS.
In the 14/1/4:1 configuration a short-press/pulse causes a 1 to be sent to the group address 14/1/4, resulting in on/off switching of the dimming actuator. In the 14/1/5:9 configuration, a long press results in dimming, i.e., a 9 is sent to address 14/1/5. In the 14/1/5:0 configuration, dark dim results. The ‘EIB Extended Sensor’ is excellent for this application.
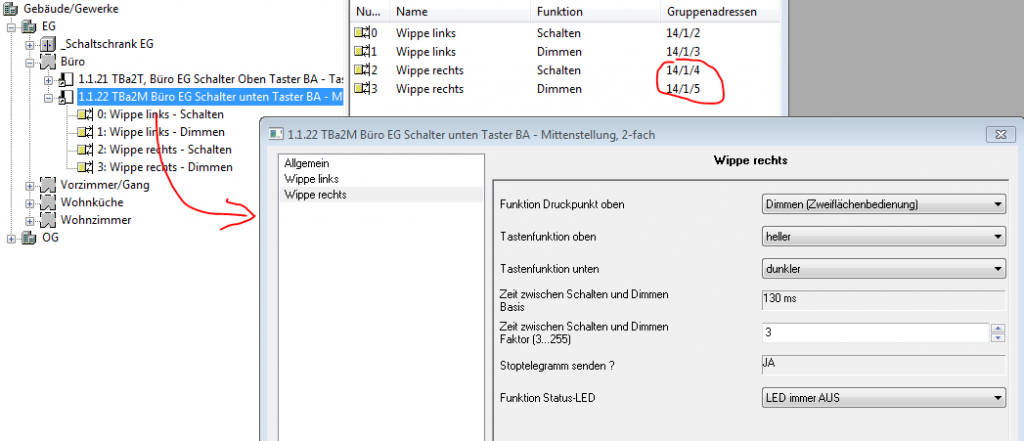
This image shows the configuration of the EIB push-button in ETS:
Here you see the properties of the ‘EIB Extended Sensor‘ in the Loxone Configuration Software with registered group addresses, i.e., this sensor follows the group addresses. When ‘Do not send a response‘ is enabled, the Miniserver does not send acknowledgments.

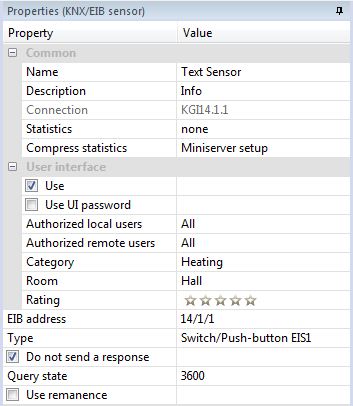
EIB TEXT SENSOR
Using a text sensor, the Miniserver can retrieve and display text from the bus. In ‘Query State‘, you can set the cycle during which a query is sent. Use ‘Query State‘ sparingly, as it places an unnecessary load on the EIB-bus.
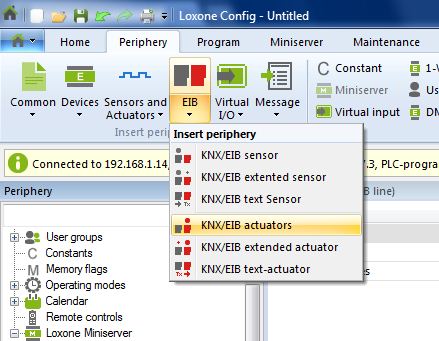
EIB ACTUATORS
EIB ACTUATOR
In the ‘Periphery’ tab you’ll find: EIB Actuator, EIB Extended Actuator and EIB Text Actuator. Clicking on the desired option opens a inserts the actuator in the periphery tree window in the ‘KNX/EIB line‘ section.
The Configuration Software allows you to send a group address onto the bus using an ‘EIB actuator‘.
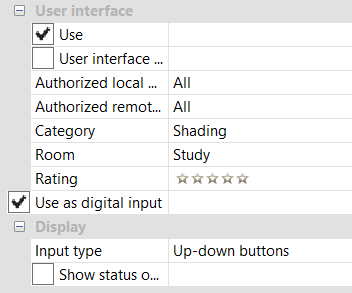
In this following example, we’ll focus on blind control, using the user interface and Loxone EIB actuators for raising and lowering the blinds.
For the user interface, use a ‘virtual input connector‘. In its properties set the ‘Input type‘ to: up-down push-button.

Here is a screenshot of the configuration as seen in the configuration software:
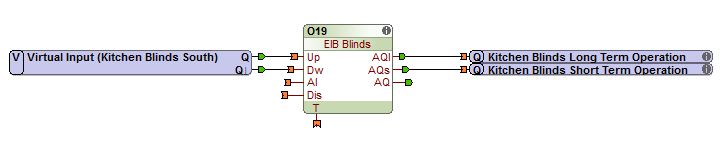
The ETS configuration.

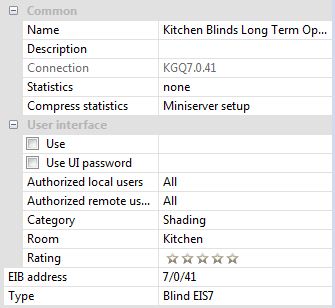
These screenshots show the settings of EIB actuator for long-term operation. Note the correct group address and set Type to Blinds EIS7. Configuration for short-term operation is analogous.
EIB EXTENDED ACTUATOR
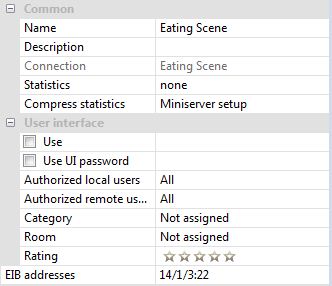
Using an Extended Actuator you can values to specified addresses on the bus. This may be necessary if you want to retrieve an ETS-configured ‘EIB scene’. For example, the ‘dining’ scene requires the value 22 be sent to group address 14/1/3. Writing 14/1/3:22 in ‘EIB address’ accomplishes this. You can also send Percentages, etc. See screenshot:
EIB TEXT ACTUATOR
An EIB Text Actuator can send text messages onto the bus. Ensure that you have entered the correct group address in Properties of the particular Text Actuator.