OVERVIEW
The Loxone DNS Service service is a free, simple to setup dynamic service that lets you access your network externally.
The Loxone DNS Service enables you to easily connect to your Miniserver remotely. In order to ensure a safe external connection it is important to set up a secure password, that is different to the Miniservers’s standard login credentials.
All remote connections to Miniservers with default login credentials through the Loxone DNS service will be blocked. In the latest version of the Loxone Smart Home App (7.0 and later)users can change their passwords directly from within the app. To avoid this feature from being abused, this is only possible from a local connection.
After changing your credentials, operation of the DNS service will resume. Please note that this can take up to an hour.
SETUP THE DNS SERVICE
To be able to control your Miniserver from outside your home network you need to set up remote access in your router. There are two stages to this, setting up port forwarding inside your router and then registering with a dynamic DNS provider to give you a specific URL to access your network externally with.
The Loxone DNS Service allows you to register your Miniserver so you don’t have to register with another dynamic DNS provider. You still need to setup port forwarding in the router, please go to our remote access page for instructions on how to do this.
Please note that if you need to port forward to a IP camera or the Intercom that our DNS Service is currently only supported on the Miniserver. The DNS Service only supports IPv4.
 Remember the Loxone DNS Service is a free service that we provide so you don’t have to use another paid service provider! Please note that you will need to register your Miniserver in order to use the DNS Service.
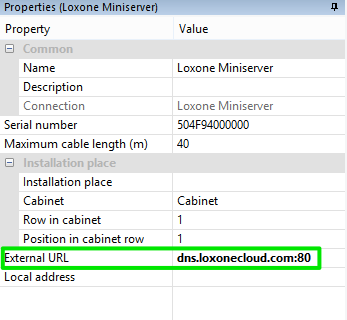
STEP 1: EXTERNAL URL IN LOXONE CONFIG
Open Loxone Config and click on the Miniserver in the periphery tree window. Now enter the Loxone DNS Service address in the External URL field. This is dns.loxonecloud.com, please then enter the port after this in the format dns.loxonecloud.com:port. Also enter the local IP address for your Miniserver and then save in the Miniserver and you are done.
CONNECTING TO YOUR MINISERVER
Now when you connect to your Miniserver with the apps the external URL and local address will be automatically in your app.
If you do wish to connect in a browser the URL you enter is dns.loxonecloud.com/Miniserver Serial Number
For example dns.loxonecloud.com/EEE000240037 or dns.loxonecloud.com/504F94100EF3.
In the apps and web browsers do not specify the port.