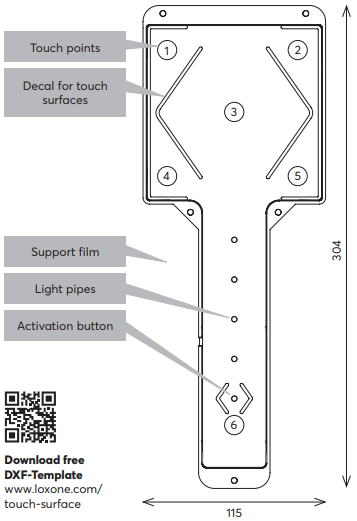
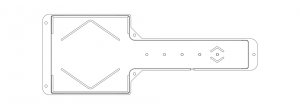
The Touch Surface Tree features six touch points to control the most important functions of a room. It is based on the Loxone switch standard.
The device can be mounted under any non-conductive surface up to 30mm (1.18 in) thick, typically a counter top. Touch is detected through the material. The surface can be stone, wood, ceramics or glass.
Table of Contents
- Mounting
- Commissioning
- Apply decal to the surface
- Optional: Holes for status LEDs
- Activation
- Calibration
- Other Materials
- Inputs, Outputs, Properties
- Safety Instructions
- Documents
Mounting↑
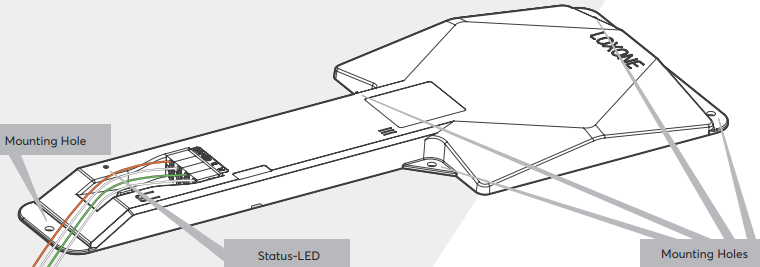
The device is mounted using the supplied adhesive tape and additional screw mounting is recommended if possible.
 | It is important to avoid an air gap between the Touch Surface and the surface! |
Please make sure that the device remains accessible after installation.
Optionally, holes can be drilled through the mounting surface for the light guides.
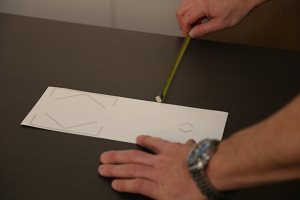
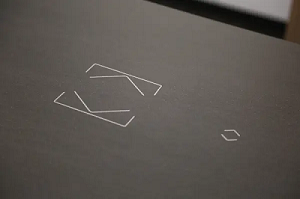
Finally, the supplied decal can be applied to the surface to mark the touch points.
Connect the power supply (orange/white terminal) and Tree communication wires (green/white terminal).
Please ensure that the Touch Surface is powered by a PELV power supply.
Commissioning↑
Shortly after power-up, the status LED will blink orange if the wiring is correct and a connection to the Miniserver (Tree Extension is online) has been established.
Then follow the pairing procedure on the Tree Interface.
Apply decal to the surface↑
With the included decal you can attach the 5 keys as well as the activation button of a Touch Surface on any smooth surface.
Step 1: Ensure that the surface is dry, free of grease and warmer than 8°C.
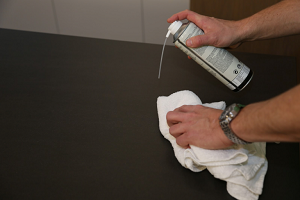
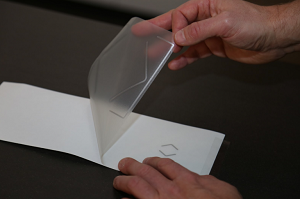
Step 2: Squeegee the lines firmly on the transparent transfer paper.
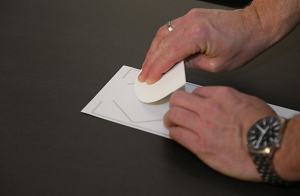
Step 3: Position the film precisely over the Touch Surface.
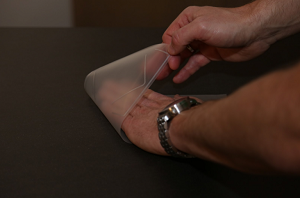
Step 4: Remove the backing paper.
Step 5: Place the decal on the surface, ensuring that it is flat, level and the correct orientation.
Step 6: Press the contour foil firmly with a flat object.
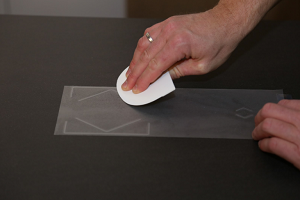
Step 7: Remove the transfer paper.
Alternatively to the decal, the surface can be milled or otherwise integrated with the five buttons and the activation button.
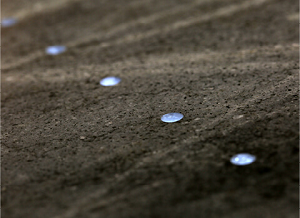
Optional: Holes for status LEDs↑
Step 1: Drill the holes for the status LEDs in the surface at an exact 90° angle using the drilling template.
Step 2: Place the five optical fiber tubes directly on the Loxone Surface and insert them into the drill holes.
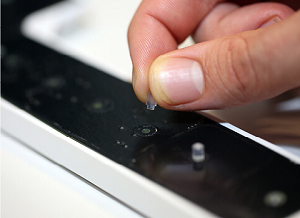
Step 3: For a waterproof and durable operating surface, we recommend having the drill holes professionally sealed from the top. For example with epoxy resin.
Activation↑
The activation button is used to prevent accidental operation. After touching this button, the switch's five touch points are activated for five seconds, the remaining time is indicated by the activation indicator. If the activation function is not required, the activation button can be reconfigured in Loxone Config.
Calibration↑
After pairing the Touch Surface, it needs to be calibrated. To do this, select "Calibrate" in the Touch Surface's properties.
Adjust the material and thickness to ensure optimum sensitivity. If necessary, use single-button calibration for finer tuning. Please test all touch points of the Touch Surface.
If a button is too sensitive, decrease the value. If any button does not respond at all, increase the value. The value can be set from -5 to +5. Then click OK and save your calibration to the Miniserver.
Other Materials↑
The Touch Surface also works with many mineral composites such as Dekton®.
No limitations are expected with solid colour Dekton® surfaces such as anthracite, grey or white.
At times manufacturers add metallic components to achieve a specific finish or colour. However, these additives may have a negative effect on touch detection, so we cannot provide a general functional guarantee for such materials.
The function of the Touch Surface must be tested by a Loxone partner prior to drilling or engraving.
Sensors↑
| Summary | Description | Value Range |
|---|---|---|
| T5 | Combined input for the 5 touch points according to the Loxone Switch Standard. | ∞ |
| Input 6 | Touch point 6 (Activation button) | 0/1 |
Diagnostic Inputs↑
| Summary | Description | Unit | Value Range |
|---|---|---|---|
| Online Status Touch Surface Tree | Indicates whether the device can be reached by the Miniserver. Diagnostics for Air devices Diagnostics for Tree devices Diagnostics for Extensions | Digital | 0/1 |
Properties↑
| Summary | Description | Unit | Value Range | Default Value |
|---|---|---|---|---|
| Monitor Online Status | If checked, you will be notified via System Status or the Mailer if the device is no longer available or goes offline. | - | - | - |
| Serial Number | Specifies the serial number of the device. Enter 'Auto' to automatically pair a Tree device with unknown serial number. This can only be used if there is only one Tree device of the same type on a standalone Miniserver (not in a Client-Gateway setup). Save in the Miniserver to pair the Tree device. Afterwards the program must be loaded from the Miniserver to transfer the actual serial number of the Tree device into the program. | - | - | - |
| Show Button 1 | Show individual button | - | - | - |
| Show Button 2 | Show individual button | - | - | - |
| Show Button 3 | Show individual button | - | - | - |
| Show Button 4 | Show individual button | - | - | - |
| Show Button 5 | Show individual button | - | - | - |
| Show Button 6 | Show individual button | - | - | - |
| Audible acknowledgement | Audible acknowledgement on button press | - | - | - |
| Activation required | When active, the Touch Surface must first be activated by pressing the activation button before the T5 touch points can be used. | - | - | - |
| Use LEDs for Activation Timer | When enabled, the integrated LEDs on the Touch Surface indicate the remaining activation time after pressing the activation button. If this option is disabled, the individual LEDs can be controlled via logic (not available for battery powered devices). | - | - | - |
| Timeout | The timeout determines how long the Touch is active after the activation button has been pressed (1-20s). The timeout is reset after each button press. | s | 1...20 | 5 |
| Calibration | Calibration of Touch Stone The device has to be already learned in and you have to be connected to the Miniserver | - | - | - |
Safety Instructions↑
The installation must be carried out by a qualified technician in accordance with all applicable regulations.
Ensure that the device is protected from water.