Network Intercommunication allows data to be exchanged between Miniservers that are connected to a network via their Ethernet interface but are programmed independently of each other.
Digital values, analog values and text can be sent, with optional encrypted transmission (AES-128-CBC).
The transmission capacity of the network intercommunication is limited to an average value of 35 messages per second over a period of 2 minutes. If this is exceeded, secure transmission is no longer guaranteed and a system message appears.
Table of Contents
Properties↑
| Summary | Description | Value Range | Default Value |
|---|---|---|---|
| Local ID | ID with which the own Miniserver can be uniquely identified by other Remote Systems. Maximum length: 8 characters | - | - |
| Port | UDP port on which packets are received. This port must also be set in the properties of the Remote System on the sending Miniserver. | 1000...65535 | 61263 |
Configuration↑
Generally, each Miniserver can act as a sender and receiver. The following examples show the necessary steps. An encrypted analogue value is sent from Miniserver A to Miniserver B.
Basic Settings
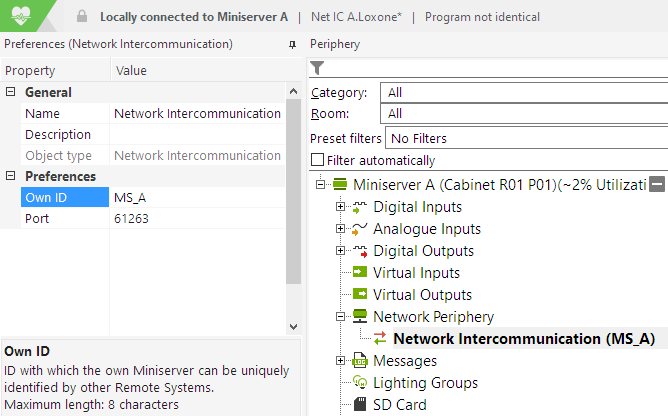
First, click on Network Intercommunication in the Periphery tree of Loxone Config, you can find it under Network Periphery.
Then assign an Own ID to each Miniserver that will use Intercommunication. Every member will be identified by it’s ID.
In the following example we will use the ID MS_A for our Miniserver:
Create Remote System
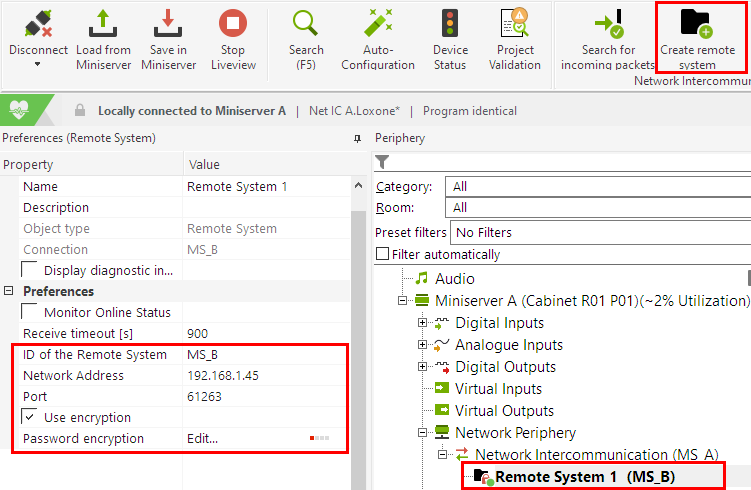
Next, select Create Remote System from the menu bar.
Enter the ID of the Remote System you want to send to or receive from.
To accept packets from or send packets to all Intercommunication members, use '*' as the ID of the Remote System, and specify a broadcast address.
In the following example, we want to send data only to a specific Remote System, in this case the Miniserver with the ID MS_B, so we specify its IP address in the network address field:
Activate Use encryption and set a secure password to prevent other intercommunication members from intercepting or manipulating data.
For encrypted communication, the same password must be entered at both the sending and the receiving Remote System.
A link between two or more Remote Systems can also be referred to as a channel.
If several channels are created with the same receivers or senders, a different password is required for each channel.
Example 1:
MS_A sends only to MS_B
MS_C receives only from MS_D
These are two separate channels, so the same password can be used on both channels.
Example 2:
MS_A sends to MS_B
MS_A sends to all (*)
In this case there are two channels, but with the same sender.
Therefore a different password must be used for the different channels.
However, the passwords used for Remote Systems linked via the same channel must still be identical.
Sending a Value
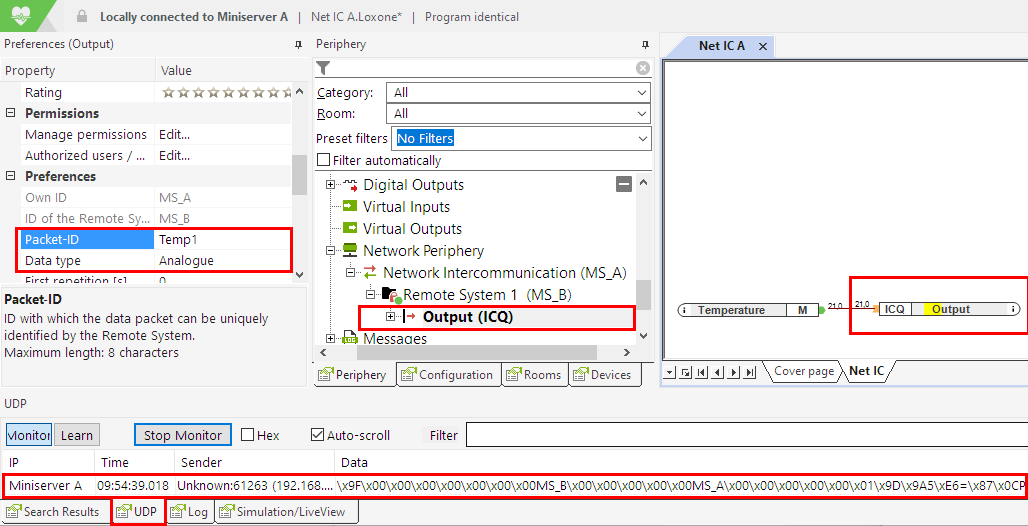
To send a value, now select Add output. This creates an actuator that can then be used in programming.
To be able to identify the outgoing packet, select a unique Packet ID.
By setting a Type, you define whether it is a digital value, analogue value or text.
Finally, save the program to the Miniserver, the sent value is now visible in the UDP Monitor.
In the following example we send a temperature value with the Packet ID Temp1 from Miniserver MS_A to Miniserver MS_B:
Receiving a Value
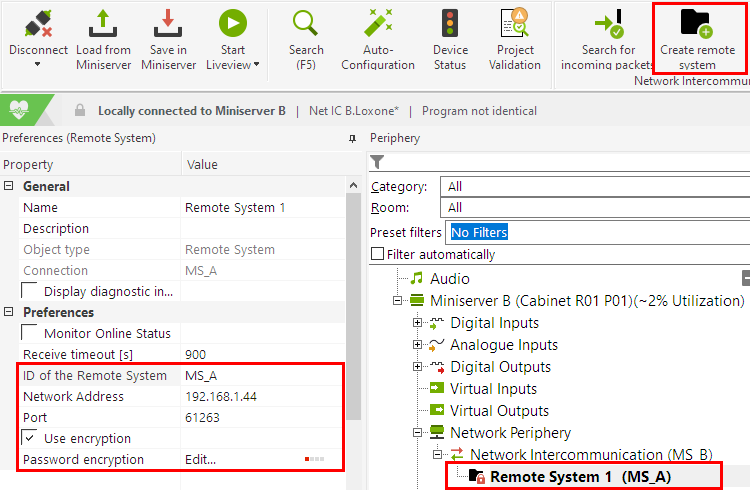
We now switch to another Miniserver and also assign a Own ID for Network Intercommunication, that is different from the other members.
Again, we need to first create a Remote System with the ID MS_A, as this is the Remote System that we want to receive values from in our example.
Since we enabled encryption on the sender, we will do the same here and also enter the same password.
When using encryption, the address of the Sender is also required.
If encryption is not used, the address field on the receiving Miniserver can be left blank:
Next, we select Add Input. which creates a sensor.
For identification we use the Packet ID Temp1, which we defined earlier on the sending Miniserver.
For Data type we again select Analog, since it is a simple analogue value.
After the program is saved in the Miniserver, the incoming packets are visible in the UDP monitor. The input can now be used in programming:
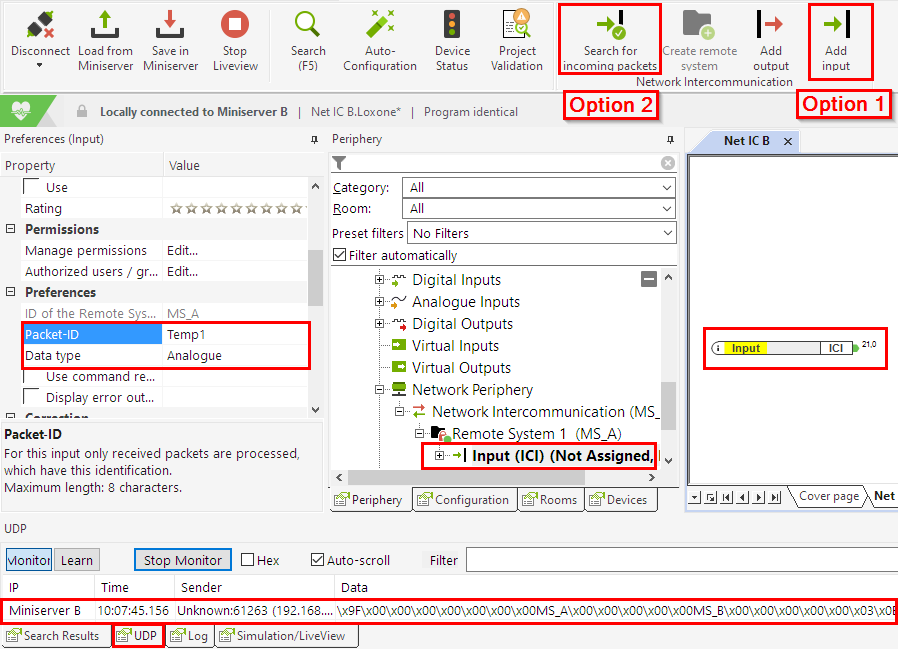
Alternatively, incoming packets can also be learned without having to enter the settings manually. To do this, click the Search for incoming packets button in the menu bar.
A window will open and incoming packets will be displayed on the left. Select a packet, and add it to the programming as an input using the + button:
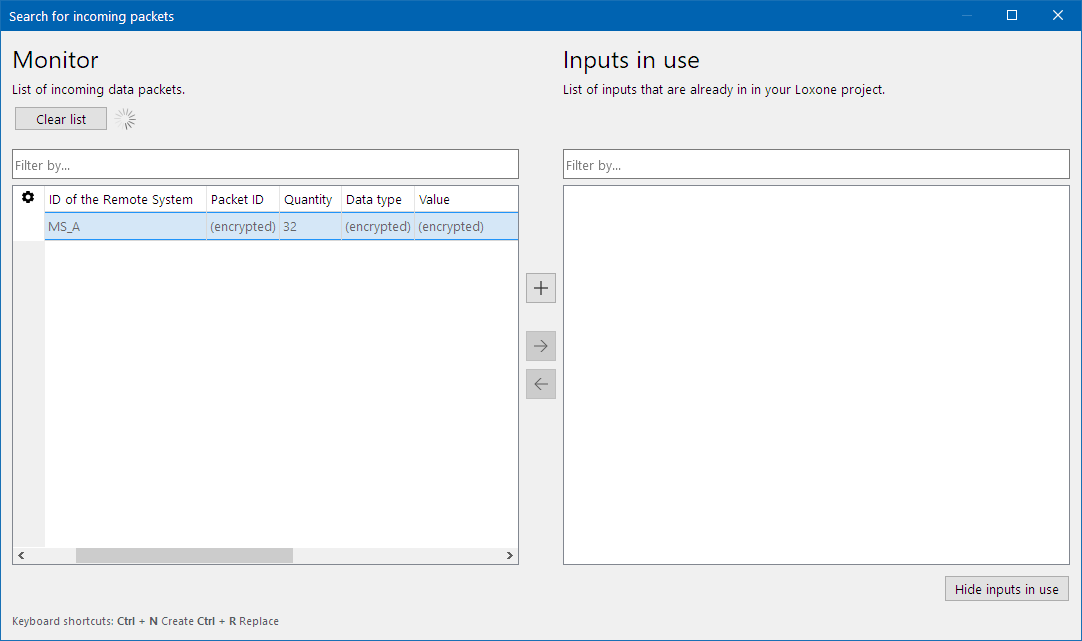
For encrypted packets, you will be prompted to enter the password. After saving to the Miniserver, the input can be used.
Network Intercommunication Setup for Loxone Miniservers on Separate Networks
When connecting two Miniservers over the Internet, follow these guidelines:
Port Forwarding: Set up port forwarding on the router of each Miniserver that will receive incoming connections. If only one Miniserver needs to communicate with the other, configure port forwarding only on the receiving Miniserver.
Encryption: For encrypted communication, both Miniservers require access tp each other. This involves setting up port forwarding on both sides to enable secure data exchange.
Direct Forwarding: Avoid using a broadcast address. Instead, forward the designated port directly to the receiving Miniserver’s internal IP address.
This setup is necessary to ensure reliable and secure network intercommunication between Miniservers across separate networks.