PUSH BUTTONS AND MORE
As a general rule, you can use Loxone to create a comprehensive user interface without having to re-configure the existing EIB installation.
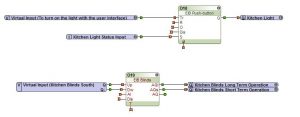
Use the ‘virtual input connector’ when creating controls (push buttons, slides, up/down, etc.) in combination with the EIB blocks and EIB actuators as shown in the below example.
Simply click on the program block and check the box ‘Use’ in the User interface section of the Properties window for the block. Also so that whichever status is visualised correctly a sensor with the status group address must be linked to the S input of the EIB pushbutton.
![]() Do not use EIB-sensors to put push buttons on the user interface!
Do not use EIB-sensors to put push buttons on the user interface!
Most EIB push buttons are programed such that pressing once results in the transmission of a ‘1’, and letting go transmits nothing. Pressing again sends a ‘0’; pressing a third time sends a ‘1’ again, and so on. Because Loxone’s Miniserver responds to the rising edge – ‘1’, this sequence would result in a change of state (on/off), only every second press.
DISPLAYING SENSOR VALUES
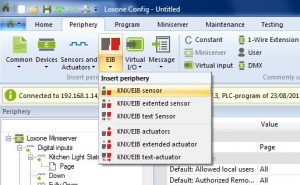
To display values from temperature or wind speed EIB sensors on the user interface, select ‘EIB sensors‘.
To add a sensor in you can either add it from the Periphery tab in the top ribbon and then select the EIB drop down button, or you can press F4 and search for EIB. You can then double click on anything in this search box and it will add it into the page. Group addresses and other settings are then configured in the Properties window to the far left of the software.
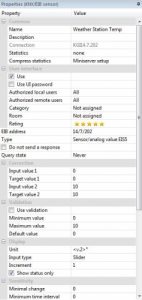
In the Properties window of a particular EIB object, select the appropriate options. It is important to set the correct EIB data type and desired display options.
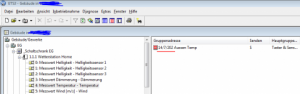
The following screenshot from Loxone Config illustrates the displaying of a temperature value from the EIB Weather Station.