OVERVIEW
With the Loxone system we know that there can be many different ways to create lighting in your home. Here we can now take the devices we have in the system.
Single Switched Output
Single Dimmed Output
Multiple Dimmed and Switched Outputs (Including 24V RGBW Downlights & LED Strip Tape)
Scenes
Single Switched Output
![]()
![]()
![]()
![]() Please remember to save as you go, both ‘Save in Miniserver’ and a local back up on your computer.
Please remember to save as you go, both ‘Save in Miniserver’ and a local back up on your computer.
To setup the Lighting Controller Function block for a single switched circuit you first need to bring open Loxone Config, find a page and press F5. Once a little box pops up, type ‘Lighting’ and you will see the Lighting Controller appear.
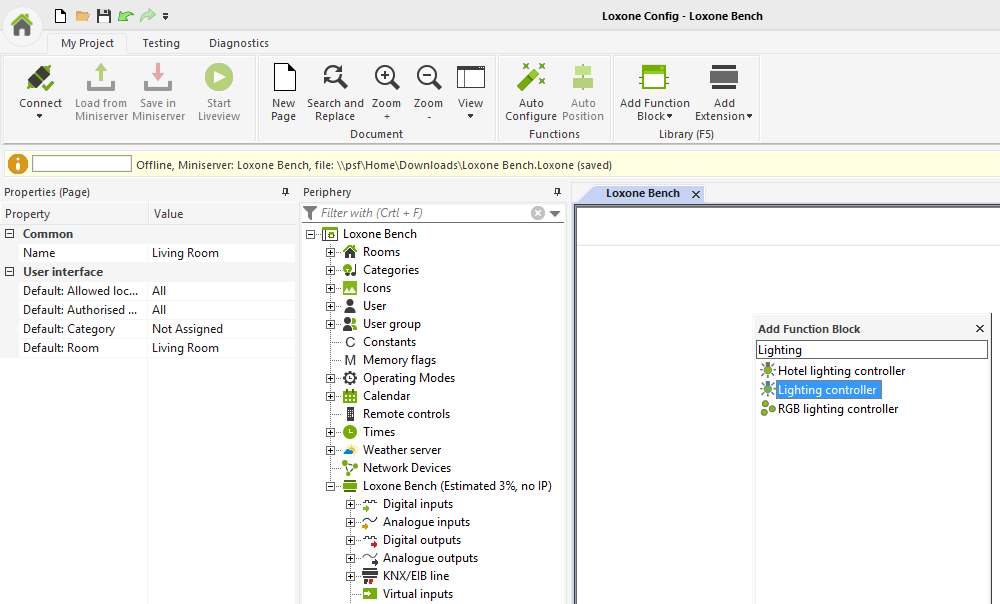
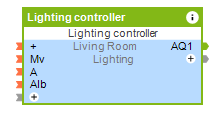
Double click on the name and the block will be dropped into the page.
Drag out your Touch Switch (either Touch Air or Touch Tree) and you will see your Lighting Controller will begin to flash. If you drop the Touch Switch directly onto the block, the T5 input will automatically appear and be assigned.
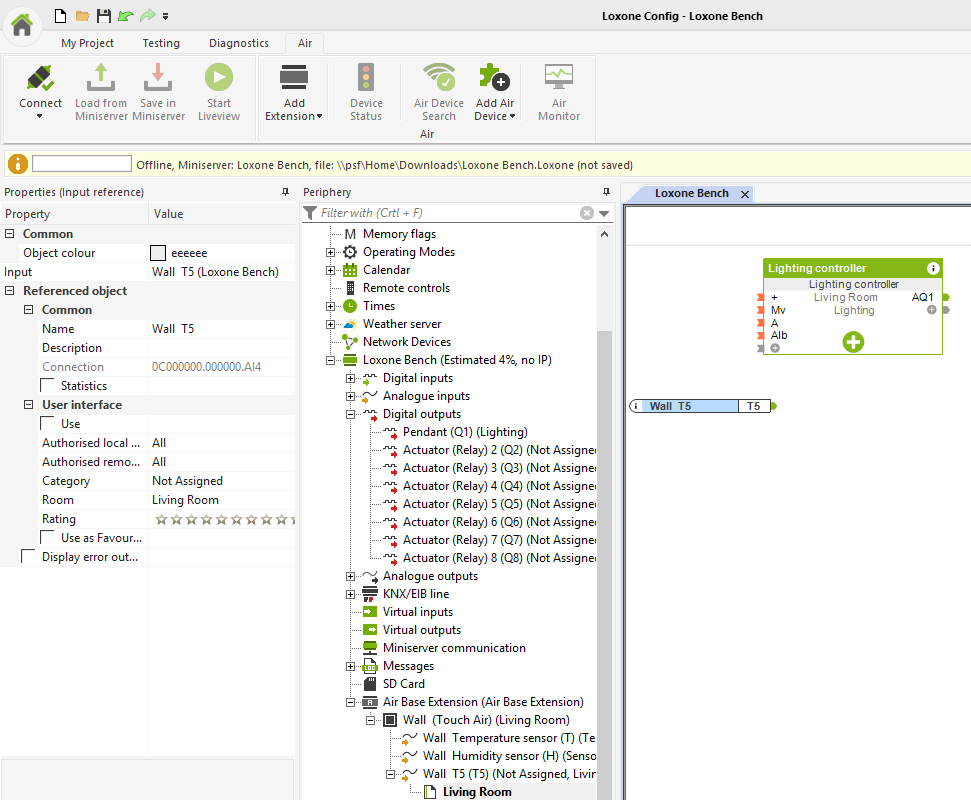
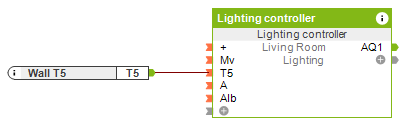
Select your respective output and drag this onto the Lighting Controller again. Just like with the input, the Lighting Controller will flash.
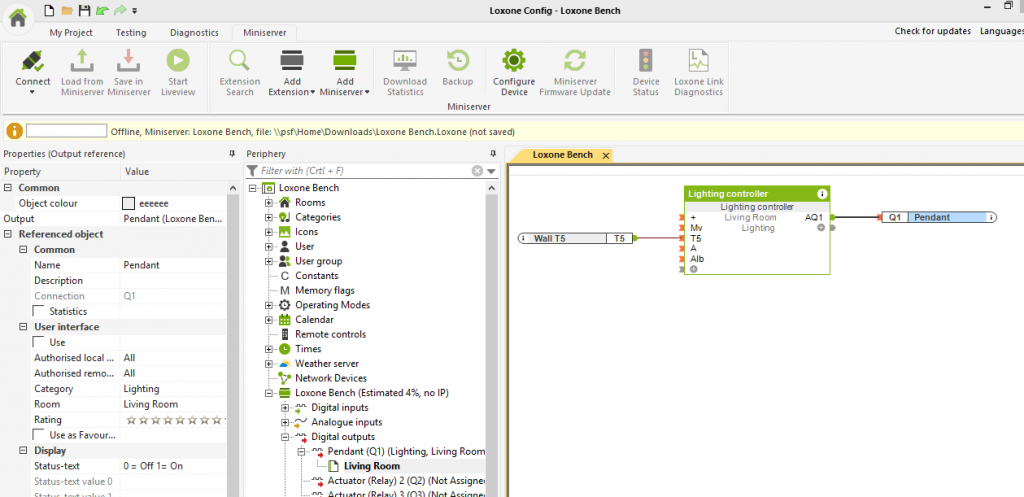
Please note that yours maybe different depending on what device you are using (Air/Tree/Miniserver/Extension) but they will still be a digital output.
By default, the T5 input will automatically scroll through scenes. As we are not using scenes at the moment, if you double click on the lighting controller and tick ‘All OFF scene (S0)’ this will make sure you switch will toggle the lights on and off. If you want to learn about scenes you would need a Dimmed output or even better, a mixture of both; follow here to find out more about scenes.

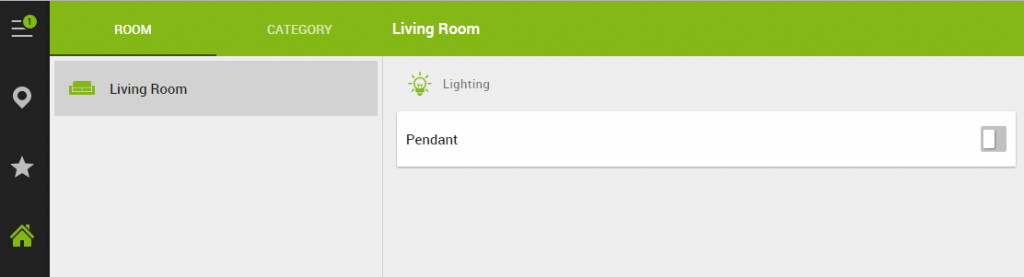
Save this into your Miniserver and then check out how the user interface will look.
Single Dimmed Output
![]()
![]()
![]()
![]() Please remember to save as you go, both ‘Save in Miniserver’ and a local back up on your computer.
Please remember to save as you go, both ‘Save in Miniserver’ and a local back up on your computer.
To setup the Lighting Controller Function block for a single Dimmed circuit you first need to bring open Loxone Config, find a page and press F5. Once a little box pops up, type ‘Lighting’ and you will see the Lighting Controller appear.
Double click on the name and the block will be dropped into the page.
Drag out your Touch Switch (either Touch Air or Touch Tree) and you will see your Lighting Controller will begin to flash. If you drop the Touch Switch directly onto the block, the T5 input will automatically appear and be assigned.
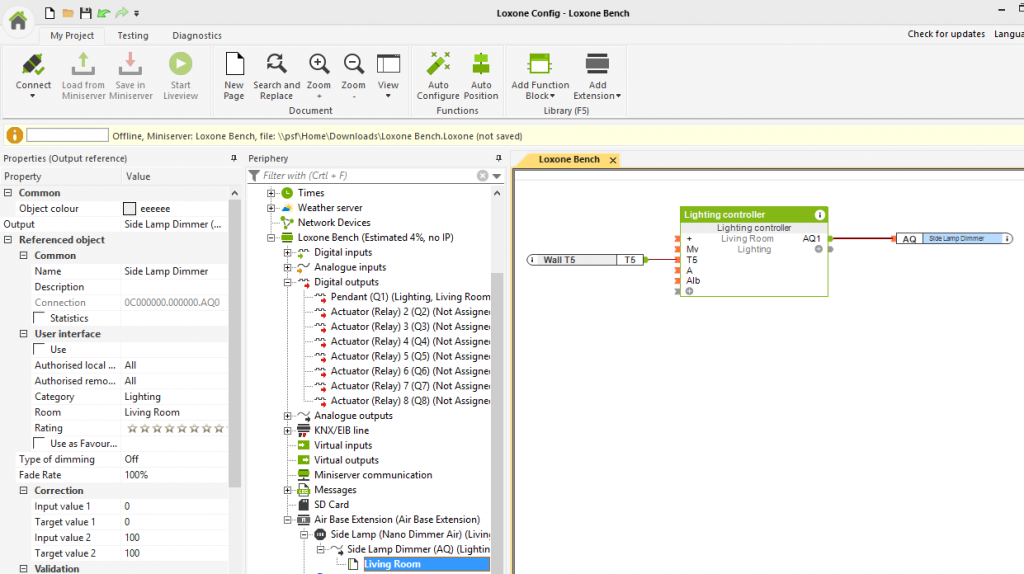
Select your respective dimmed output and drag this onto the Lighting Controller again. Just like with the input, the Lighting Controller will flash.
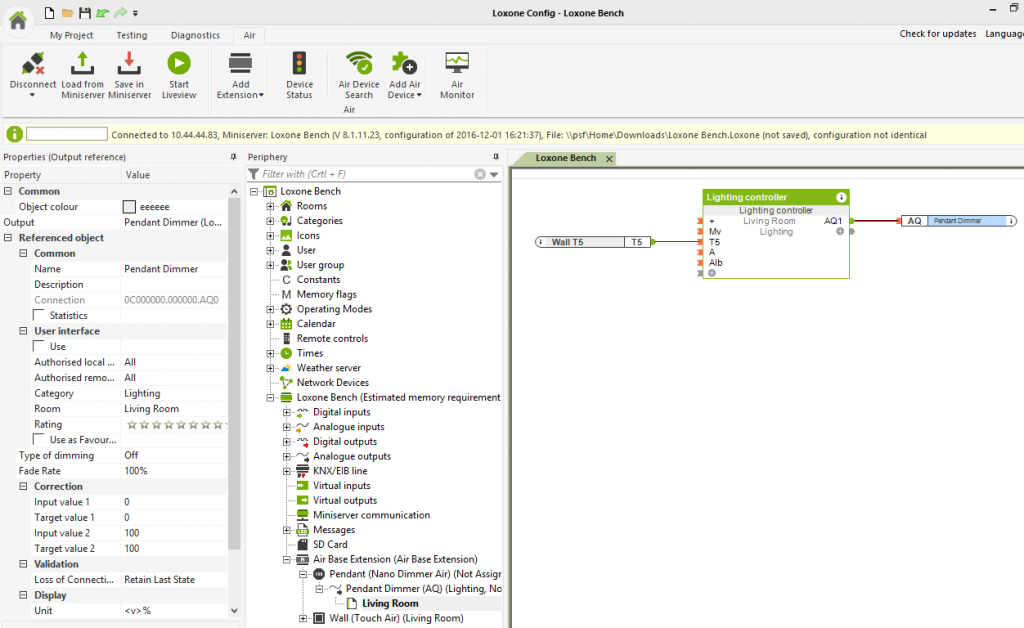
Please note that yours maybe different depending on what device you are using (Nano Dimmer Air/Dimmer Extension) but they will still be a digital output.
By default, the T5 input will automatically scroll through scenes. As we are not using scenes at the moment, if you double click on the lighting controller and tick ‘All OFF scene (S0)’ this will make sure you switch will toggle the lights on and off. If you want to learn about scenes you would need a Dimmed output or even better, a mixture of both; follow here to find out more about scenes.
Save this into your Miniserver and then check out how the user interface will look.
Multiple Outputs (Switched & Dimmed)
![]()
![]()
![]()
![]() Please remember to save as you go, both ‘Save in Miniserver’ and a local back up on your computer.
Please remember to save as you go, both ‘Save in Miniserver’ and a local back up on your computer.
To setup the Lighting Controller Function block for a Multiple circuits, both Dimmed and Switched you first need to bring open Loxone Config, find a page and press F5. Once a little box pops up, type ‘Lighting’ and you will see the Lighting Controller appear.
Double click on the name and the block will be dropped into the page.
Drag out your Touch Switch (either Touch Air or Touch Tree) and you will see your Lighting Controller will begin to flash. If you drop the Touch Switch directly onto the block, the T5 input will automatically appear and be assigned.
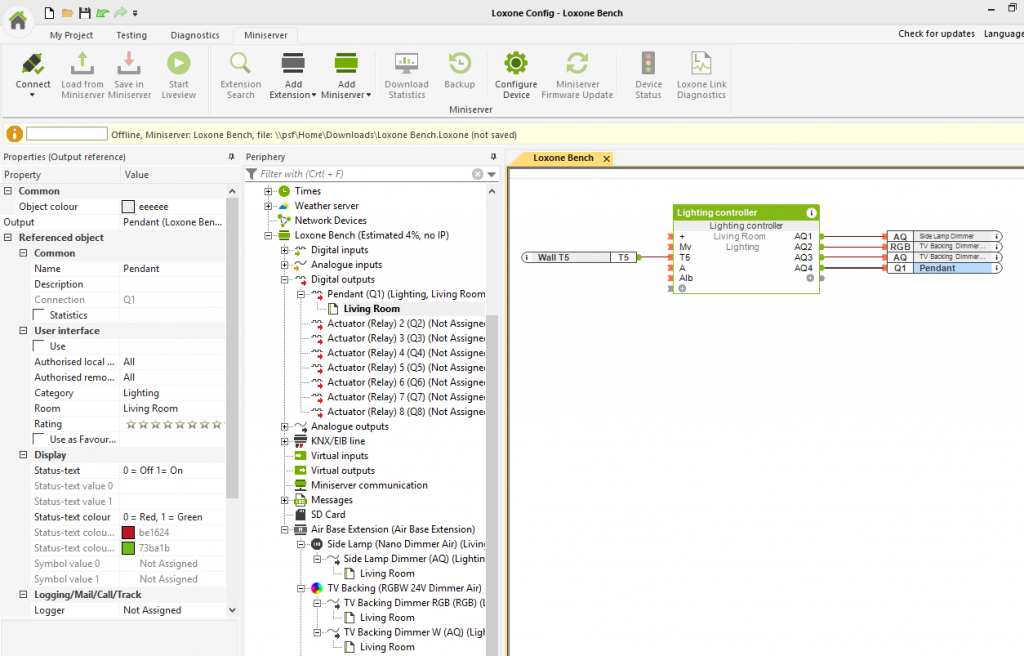
Select your respective dimmed output and drag this onto the Lighting Controller again. Just like with the input, the Lighting Controller will flash.
Repeat this step for your switched outputs and RGB & W (red, green, blue and white).
You may want to change the output name of a device before saving into the Miniserver. This will keep all the outputs looking neat and presentable.
To do this double click on your Lighting Controller and click on the ‘Outputs’ tab.

Change the output names and assign the outputs names that make more sense for device location (remember this is what you or the customer will see on their Loxone application).
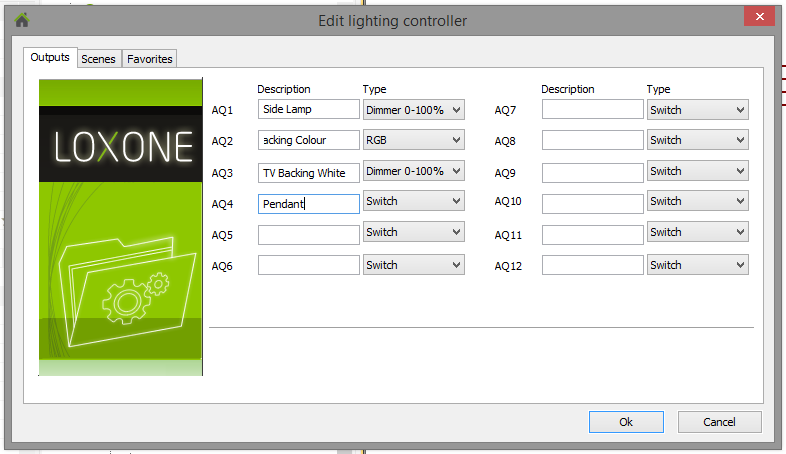
Click ‘Ok’, save this into your Miniserver and then check out how the user interface will look.
Now you can create some incredible scenes with your multiple outputs!
Scenes
![]()
![]()
![]()
![]() Please remember to save as you go, both ‘Save in Miniserver’ and a local back up on your computer.
Please remember to save as you go, both ‘Save in Miniserver’ and a local back up on your computer.
Once lighting outputs have been created, various scenes can be made to set the mood for any occasion or setting. If you need assistance on how to add Lighting outputs to your configuration, we suggest reading the above steps.
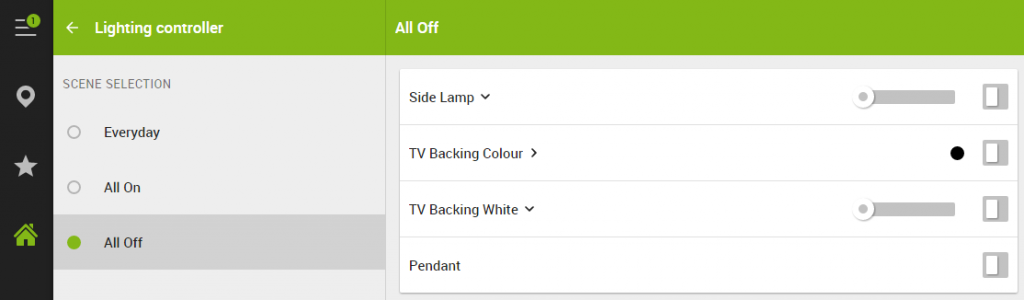
Scenes are more easily configured on the interface (via phone or web page). By doing this you can also see live how the room looks and feels to the scenes you wish to create.
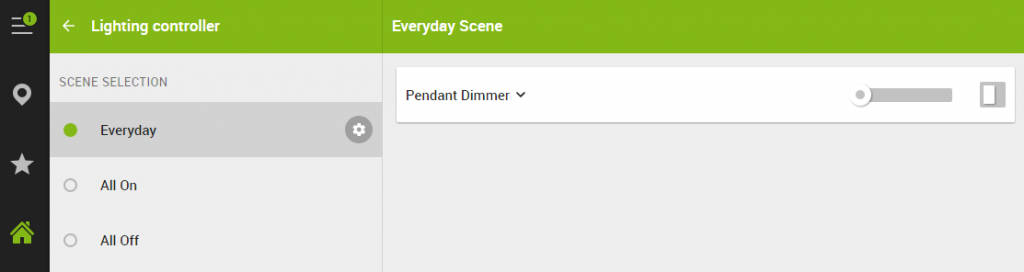
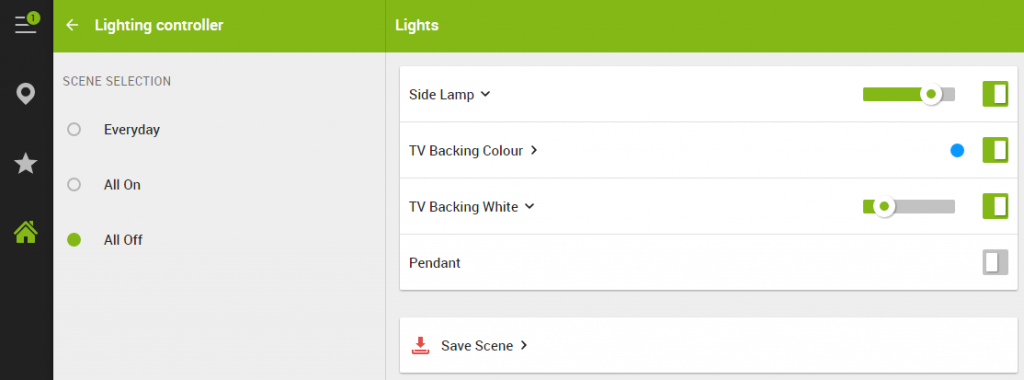
As an example, let’s create an evening scene with our multiple outputs. On our interface we currently see this:
If we change any of the lights, a button appears at the bottom; ‘Save Scene’.
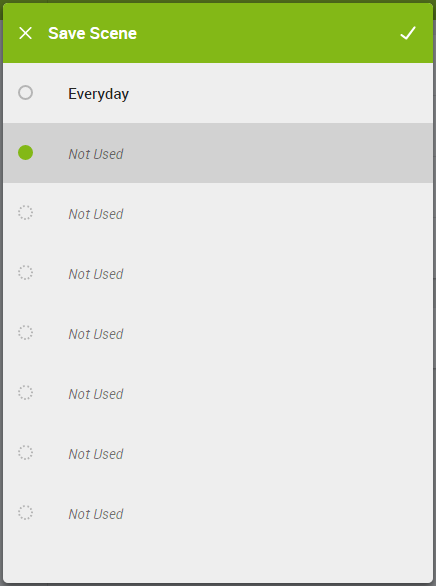
Set the lights to the levels you wish and tap/click ‘Save Scene’ (our example is for a evening lighting scene in the living room, yours may well look different to our room).
A popup box should appear allowing you to either overwrite a scene already created (by tapping/clicking on the existing scene) or create a new scene by tapping/clicking on a unused space.
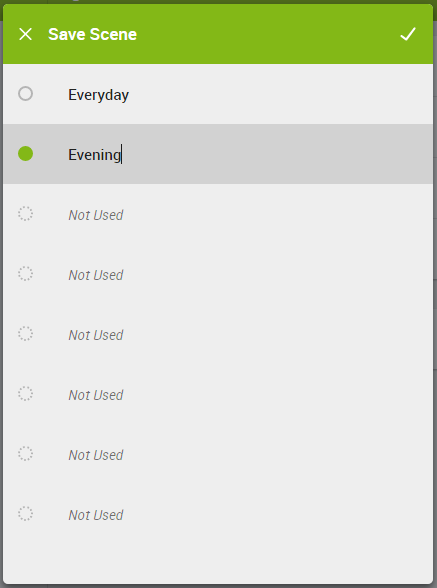
Once an appropriate name has been chosen, tap/click on the top right tick and as shown below; a new ‘Evening’ scene has been created.
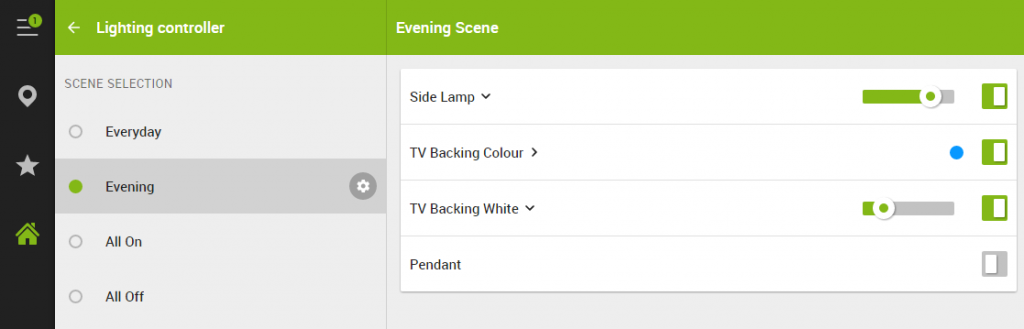
From this you can scroll through the lighting scenes using the T5 input or selecting the scene from your phone, tablet or web interface.
By default the scene scroll is as follows:
- Scene 1-8
- Scene 9 (All ON)
- Scene 0 (All OFF)