Either the Miniserver’s Tree interface, or one of the Tree Extension’s Tree branches is used to connect the devices with each other.
If a Tree branch is used for Intercommunication, no Tree devices can be connected to this Tree branch. It is exclusively used for Intercommunication.
The wiring must always be in linear or daisy-chained topology, with up to 500m length.
In addition to the Tree data lines the connection of GND is also necessary.
This way, up to 50 Miniservers can be connected.
The following picture illustrates an example of how tree intercommunication can be wired:

Tree Extensions shipped before the end of October 2020 had a permanent, built-in termination. Only two of these Extensions can be used for Intercommunication and only at the data line end-points.
Since the end of October 2020, a new version of the Tree Extension is being shipped, which is equipped with a switchable termination, thus allowing up to 50 devices.
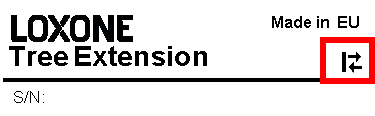
The new version can be identified by the following symbol on the label:
The transmission capacity varies depending on the application, the following guidelines apply:
Up to 1 packet per second can be transmitted across all members (multiple senders and receivers).
If only one member sends, and all others receive, then up to 20 packets per second are possible.
When using encryption, the maximum transmission rate will be lower.
Please select the transmission cycles with care and avoid sending values every second.
Configuration Example:
Every Miniserver can act as sender and receiver.
The necessary steps are shown in the following examples.
An encrypted analog value is sent from Miniserver A to Miniserver B.
Basic Settings
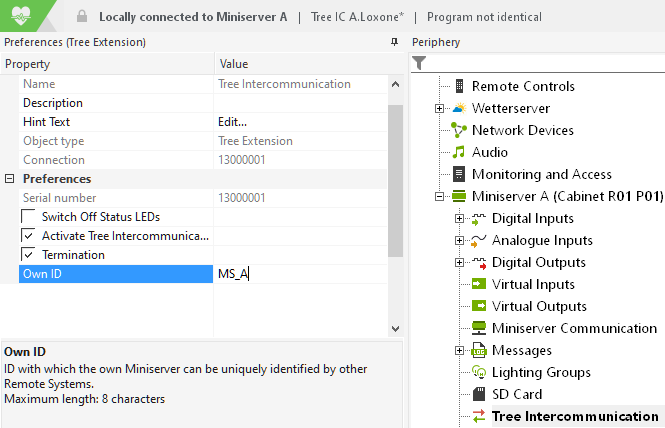
In the Periphery tree, select the Tree interface to be used for Intercommunication and activate the option Tree Intercommunication in the properties.
When using the Miniserver’s Tree interface, you must also enable Termination on the first and last Miniserver.
To identify the individual Miniservers that are connected via Tree Intercommunication, please Then assign an Own ID on each Miniserver that will use Intercommunication.
Every member will be identified by it’s ID.
The maximum length of the ID is limited to 8 characters.
In the following example we will use the ID MS_A for our Miniserver:
Create Remote System
Next, from the menu bar, select Create Remote System.
Enter the ID of the members to which you want to send or from which you want to receive in ID of the Remote System.
To accept packets from all Intercommunication members or to send packets to all members (broadcast) use ‘*’ as ID of the Remote System.
In the following example we only want to send to a specific Remote System, the Miniserver with the ID MS_B:
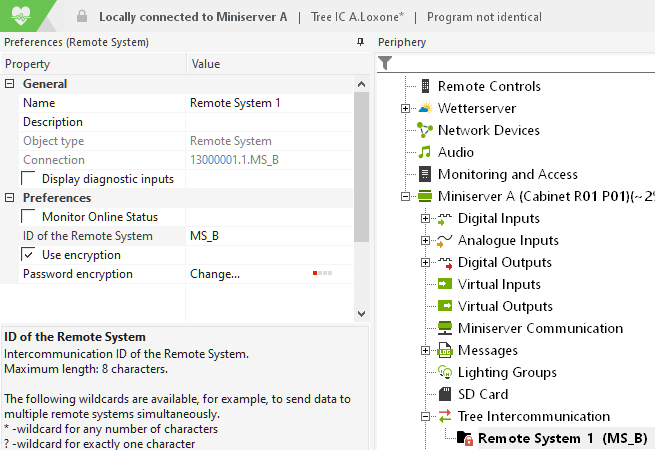
Activate Use encryption and set a secure password so that other Tree Intercommunication members cannot view or manipulate any data.
For encrypted communication, the same password must be entered at both the sending and the receiving Remote System.
A link between two or more Remote Systems can also be referred to as a channel.
If several channels are created with the same receivers or senders, a different password is required for each channel.
Example 1:
MS_A sends only to MS_B
MS_C receives only from MS_D
These are two separate channels, so the same password can be used on both channels.
Example 2:
MS_A sends to MS_B
MS_A sends to all (*)
In this case there are two channels, but with the same sender.
Therefore a different password must be used for the different channels.
However, the passwords used for Remote Systems interconnected via the same channel must still be identical.
Sending a Value
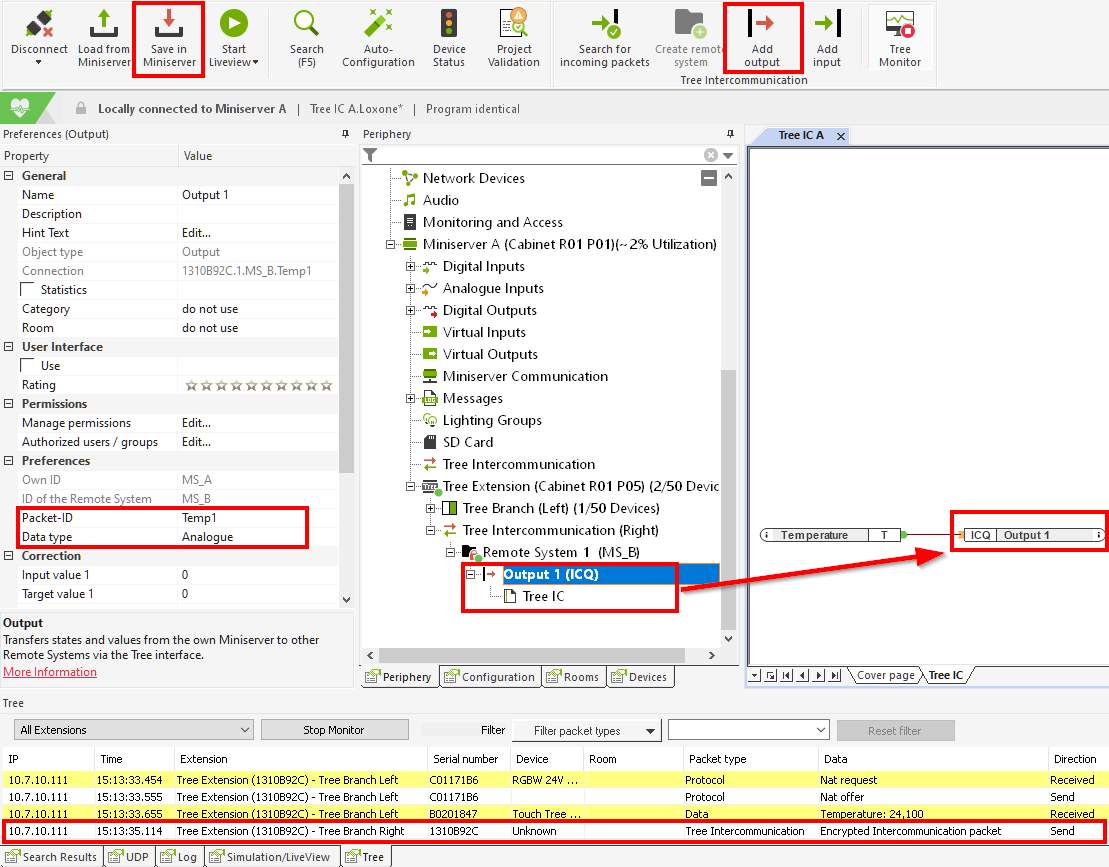
To send a value, now select Add Output. This creates an actuator that can then be used in programming.
To be able to identify the outgoing packet, select a unique Packet ID.
By setting a Type, you define whether it is a digital value, analog value or text.
Finally, save the program to the Miniserver, the sent value is now visible in the Tree Monitor
In the following example we send a temperature value with the Packet ID Temp1 from Miniserver MS_A to Miniserver MS_B:
Receiving a Value
On another Miniserver, also select the option Tree Intercommunication in the properties of the Tree branch used for Intercommunication.
Assign a unique Own ID, that is different from the other members.
Then save the program to the Miniserver to activate Intercommunication.
Again, we need to first create a Remote System with the ID MS_A, as this is the Remote System that we want to receive values from in our example
Since we enabled encryption on the sender, we will do the same here and also enter the same password.
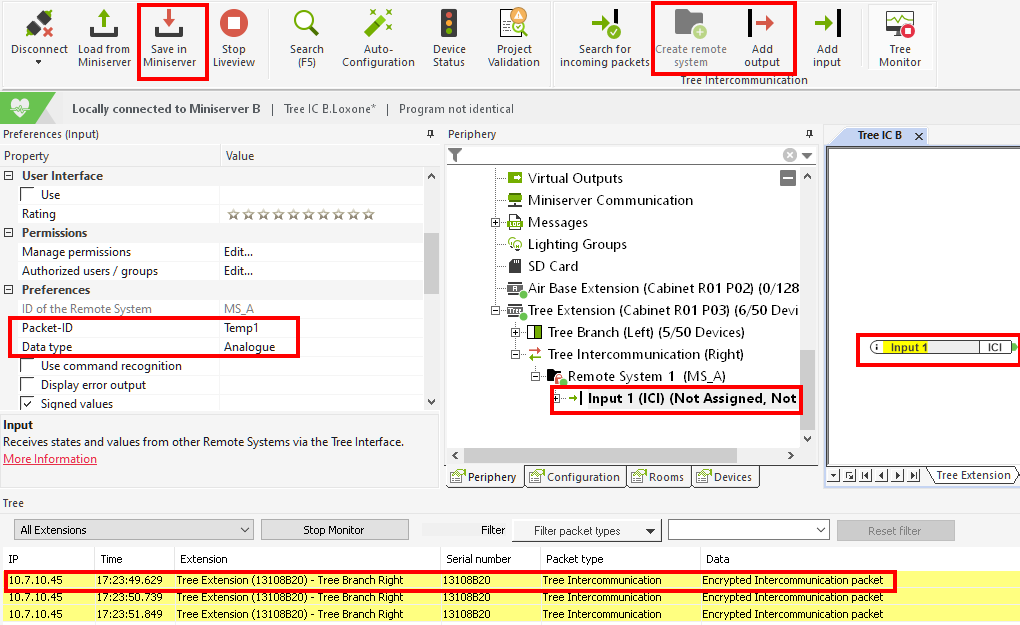
Next, we select Add Input. This creates a sensor that can be used in programming.
For identification we use the Packet ID Temp1, which we defined earlier on the sending Miniserver.
For Data type we again select Analog, since it is a simple analog value.
After the program is saved in the Miniserver, we can receive the value and use it in the programming:
Example of use
The following picture shows an example of how tree intercommunication can be used in practice:
