INTRODUCTION
It is possible if required with a preview version of Loxone config to run two versions in parallel at the same time on your computer. On this page there is a step-by-step guide how to do this without causing software conflict problems and how to access each version of Loxone Config easily.
IMPORTANT INFO
 Before we get started it is important to note that once a config file has been open and saved in a newer version of Loxone config, it is no longer possible to open it in a previous version. We recommend creating a copy of any file you wish to open in the preview version in order to ensure you can always go back and access the file in the release version.
- A preview software version which is not yet intended for final release. For this reason, we strongly recommend that you do not use a preview software version in any customer installations or critical environments.
- Please bear in mind that a preview is not the final software version and is subject to change prior to the release date. There may also be a couple of bugs lurking and maybe even the odd bit of German. Rest assured, these will be ironed out prior to release.
- If you’d like to leave us some feedback about the preview, please send an email to our support team ([email protected]). Please note that we may not be able to respond to all feedback individually.
GUIDE
For this example, we will use the current release version of 8.3 with the preview version of 9.0. However these numbers may be different depending on when you are doing this.
STEP 1:
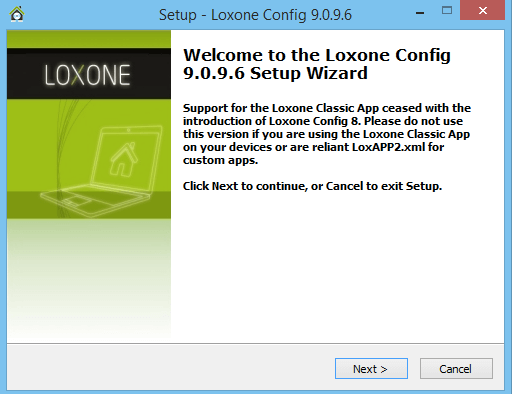
Download the Loxone Config Preview and open it from your downloads folder. When installing the new preview version the first screen of the setup wizard looks like this, simply click “next”.
STEP 2:
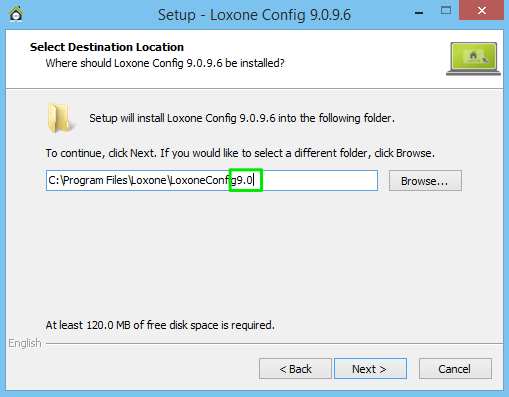
When the wizard gives you the option to “select Destination Location” add the major version number (the first two digits in this case 9.0) to the end of the location as we have here. Click “next”.
STEP 3:
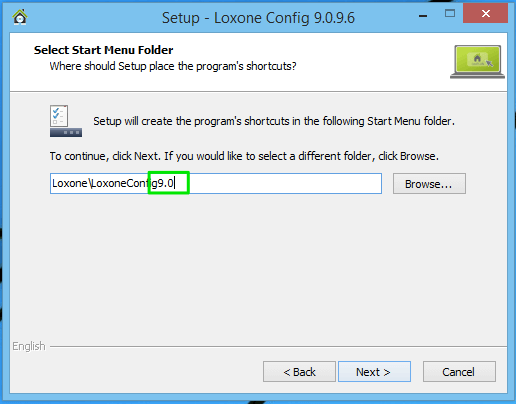
When prompted to select the start menu folder, do the same again. Click “next”.
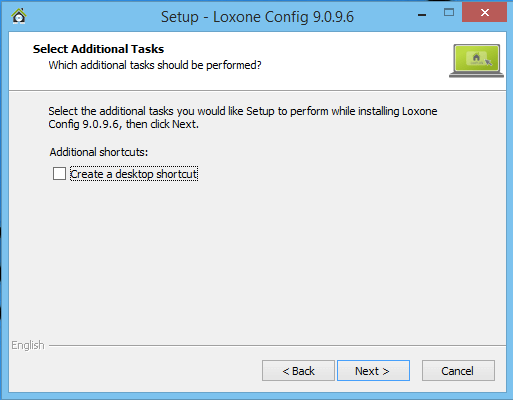
STEP 4:
When asked if you want to create a desktop shortcut we advise unselecting this for preview versions as this would overwrite the shortcut for the release version on your desktop. Best to avoid confusion. Click “next”.
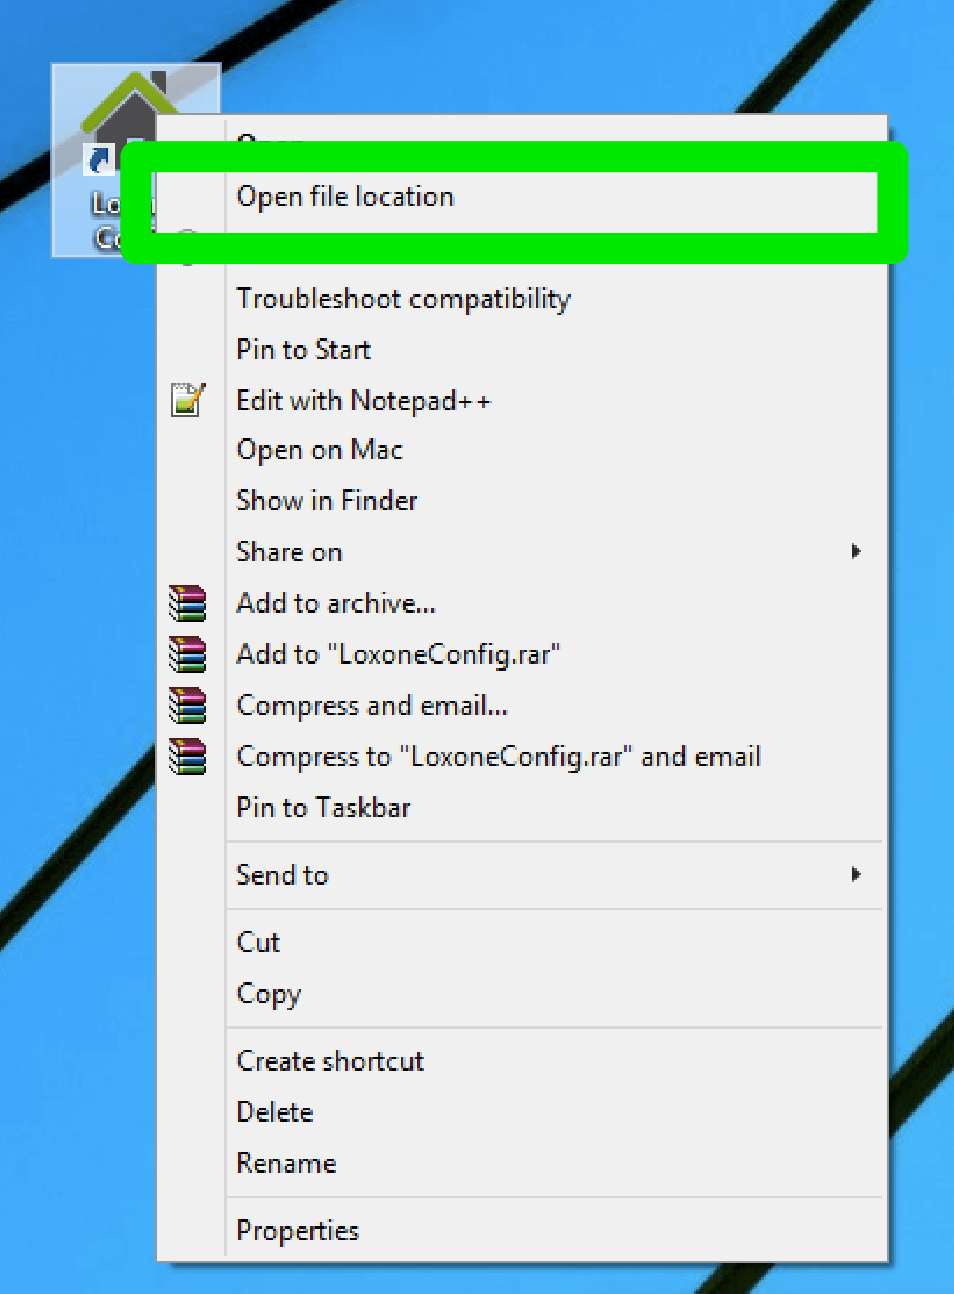
STEP 5:
After completing the installation find the “Loxone Config” shortcut on the desktop from the previous version, in our case 8.3 here. Right click this icon and select “Open File Location”.
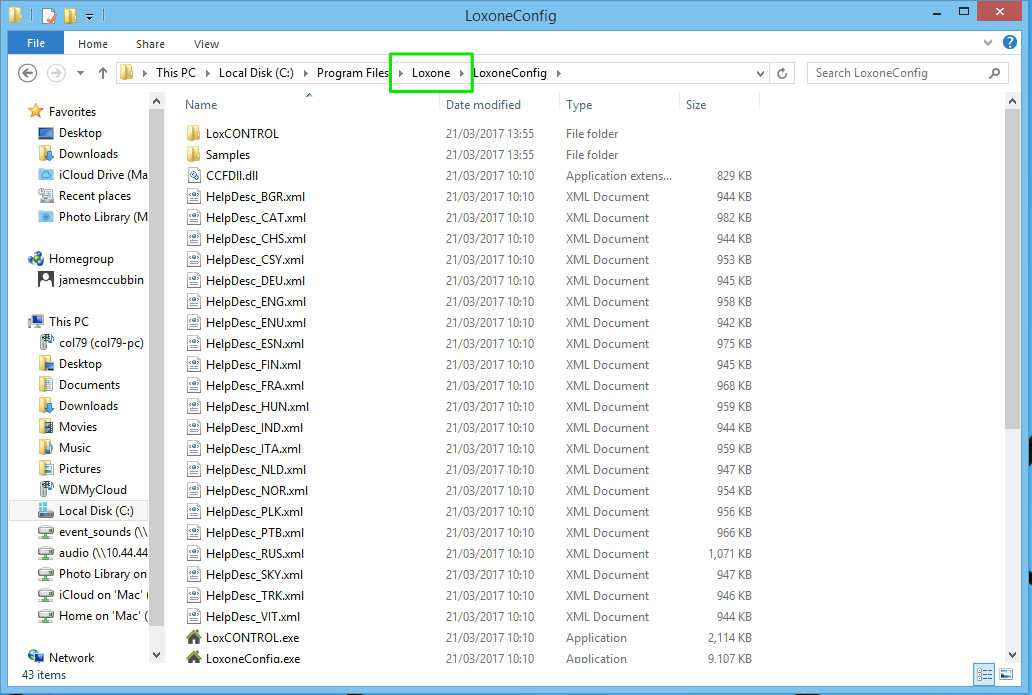
STEP 6:
This will open up the location that the Loxone Config software is installed on your PC, once in this folder look at the navigation bar at the top and where it says “Loxone” click here.
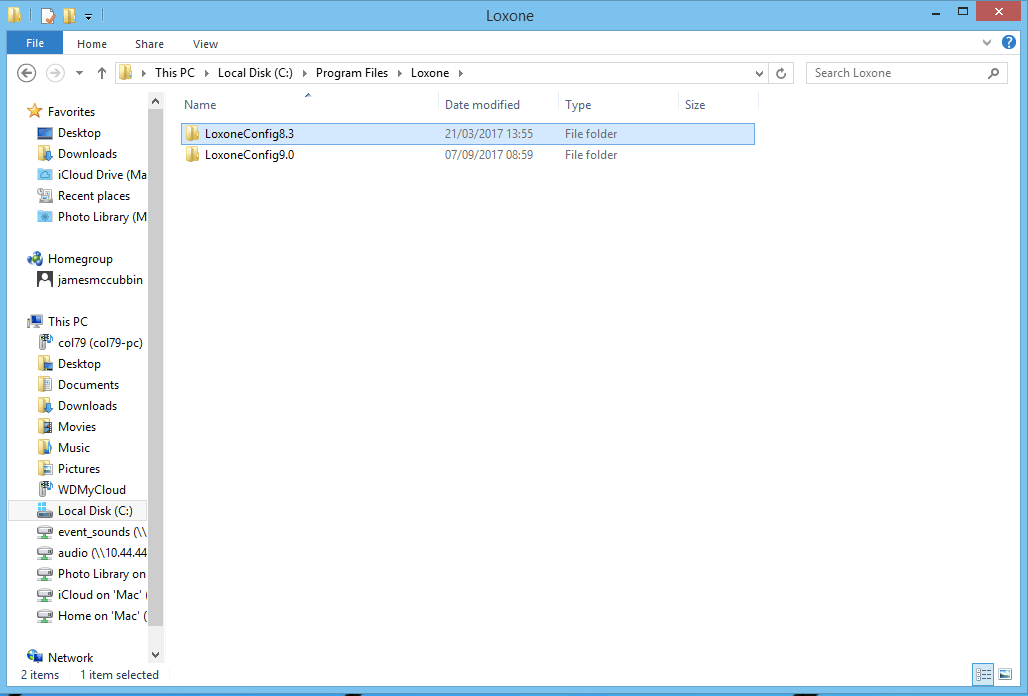
STEP 7:
You will now see two folders, your previously installed “Loxone Config” and the newly installed preview version.
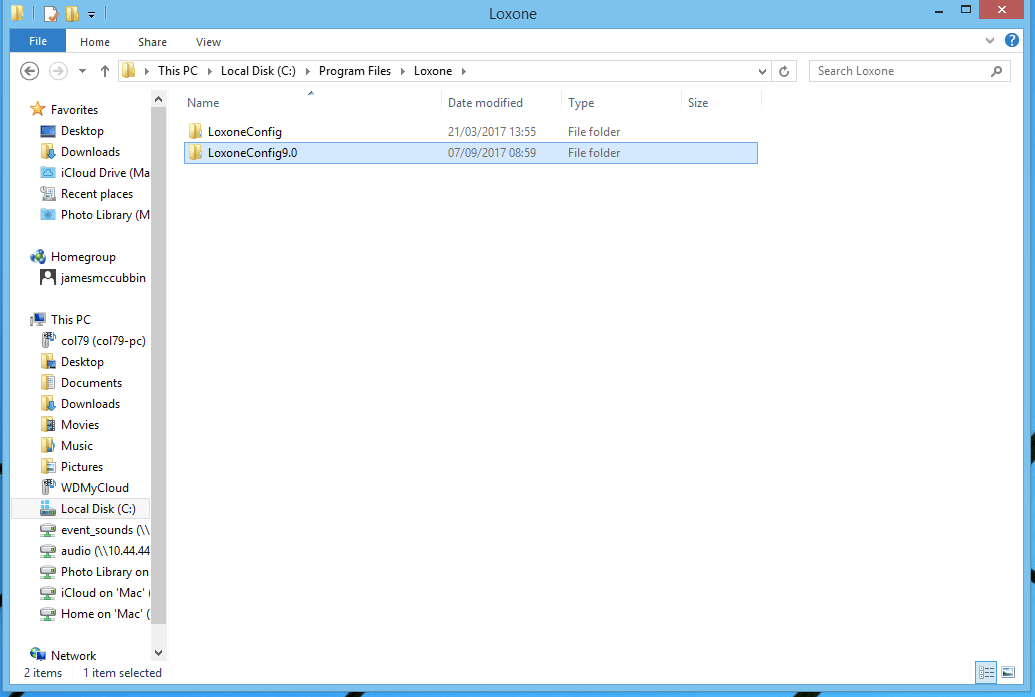
STEP 8:
Change the name of the previously installed version to include the version number as we did for the preview version, this will avoid confusion in the future. In my case this is 8.3.
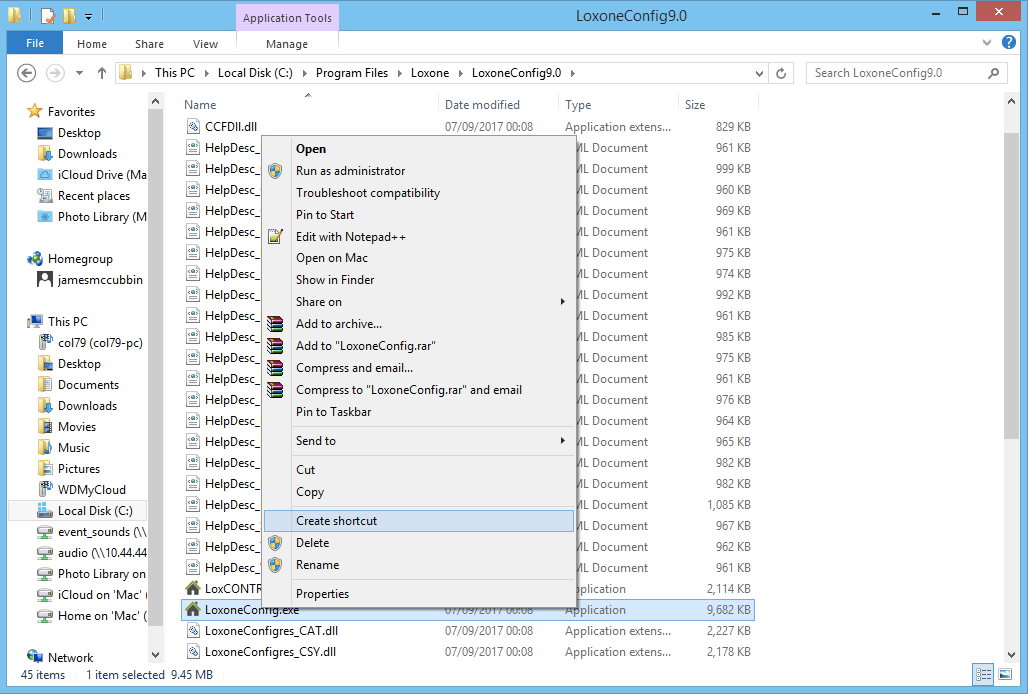
STEP 9:
Open up the folder for LoxoneConfig9.0 (or whatever your preview version is) and locate the item named “LoxoneConfig.exe” and right click it. Select “Create Shortcut” you will be forced to place this shortcut on your desktop, this is OK.
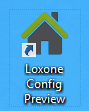
STEP 10:
Rename the shortcut created to “Loxone Config Preview” and then you will be able to find and open it whilst differentiating it from the release version that will have the shortcut simply called. “Loxone Config”.
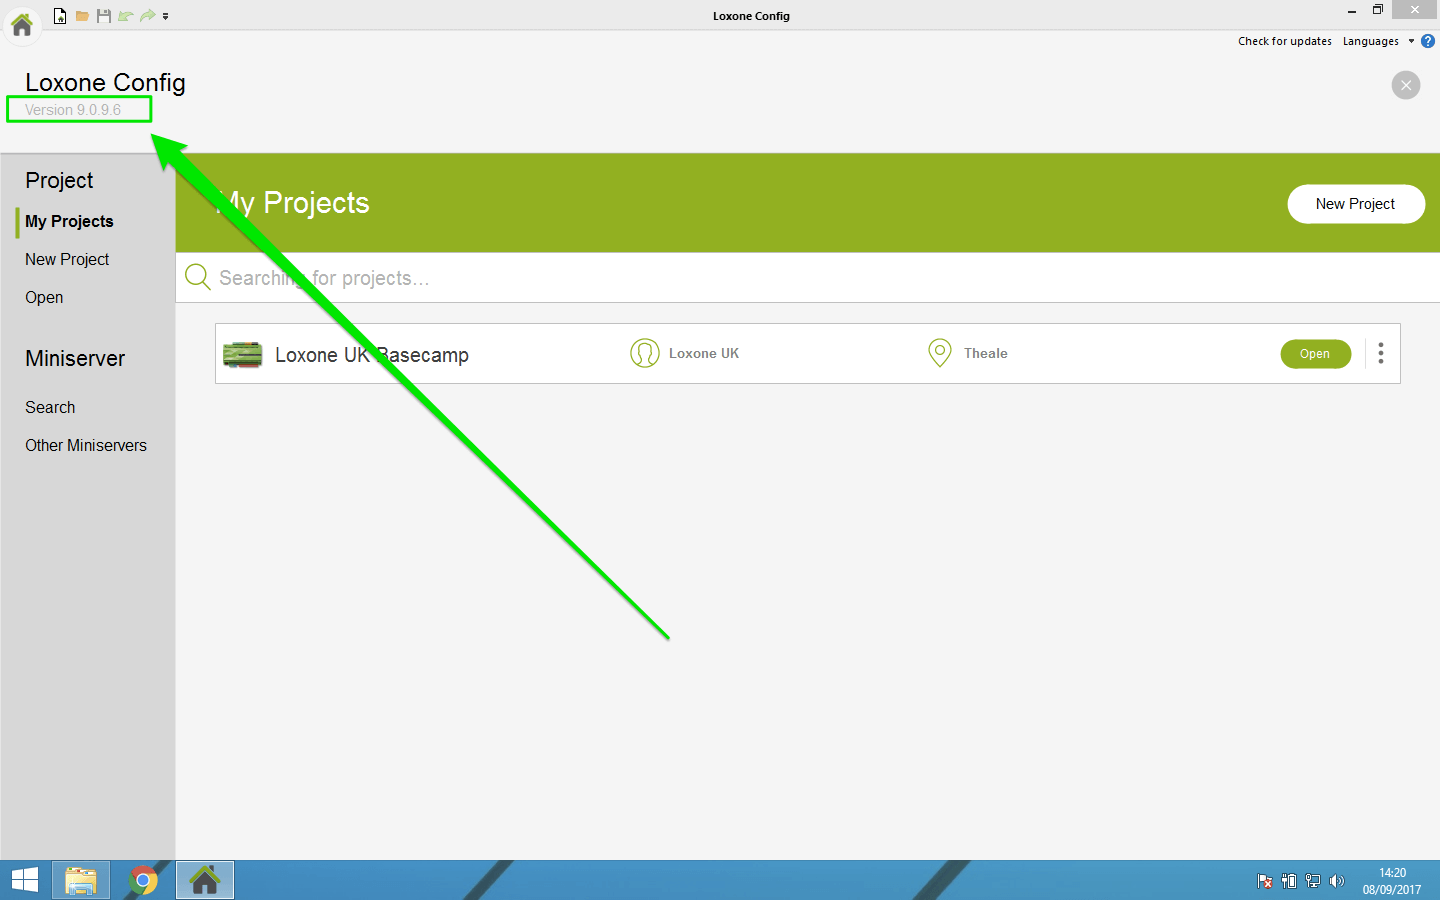
CHECKING THE VERSION OF CONFIG
When you have Loxone Config open you can check what version it is you have open by looking at the area highlighted in the screenshot below.