CONTENTS
RECEIVE UDP COMMANDS USING THE MINISERVER
- Creating a virtual UDP input
- Set sender address and port
- UDP monitor
- Create an input using the UDP monitor
- Received data error command recognition
SEND UDP COMMANDS USING THE MINISERVER
SEND AND RECEIVE UDP COMMANDS USING THE MINISERVER
The Miniserver provides a network interface to send and receive UDP commands. This capability is useful for the control of network devices that support the UDP protocol.
RECEIVE UDP COMMANDS USING THE MINISERVER
The Miniserver supports reception of UDP commands.
You can view all commands and packets using the Loxone UDP monitor.
CREATING A VIRTUAL UPD INPUT
In the Periphery tree, select the ‘Virtual inputs’ list and click ‘Virtual UDP Input’. It will then appear in the Periphery window.
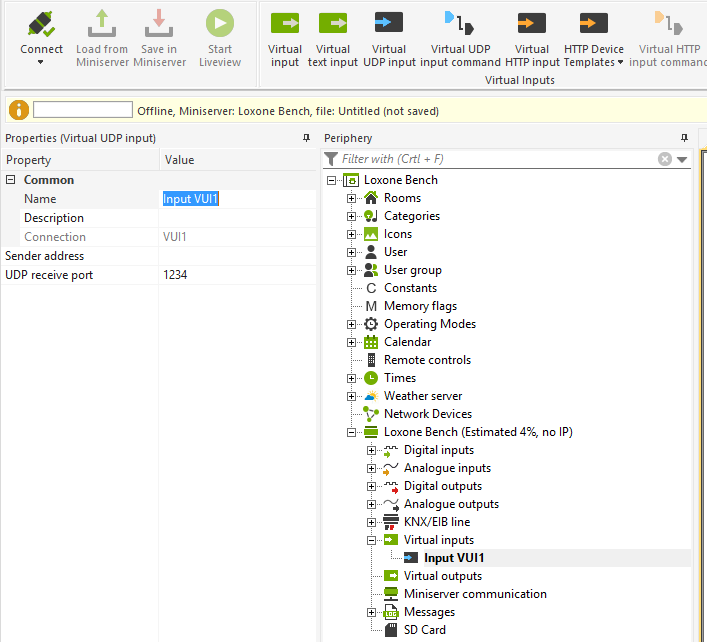
![]()
The Miniserver supports max. 50 different input UDP ports.
SENDER ADDRESS AND PORT
Click on the virtual input connector and look at the properties window. Here you can set the name, sender address (the IP address) and UDP receiver port.
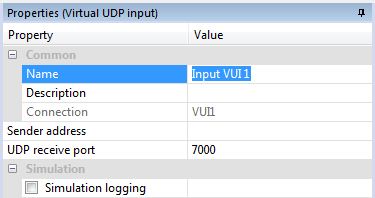
To facilitate the creation of UDP inputs, use the UDP monitor. The UDP monitor can be found under the Virtual Inputs tab. You must activate the UDP monitor in order to see all UDP packets on the network.

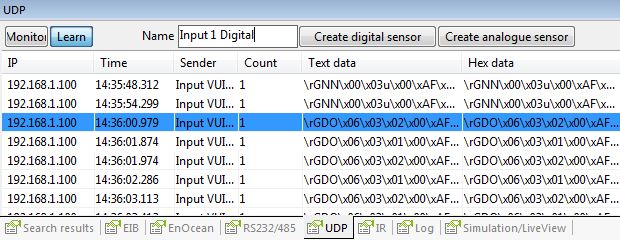
CREATE AN INPUT USING THE UDP MONITOR
In the UDP Monitor select a packet, then click on ‘Create Digital Sensor’, or ‘Create Analog Sensor’. After adding the sensor, the UDP input is displayed in Periphery. If the Text message ‘input = 1’ is sent from Miniserver lxl007f, the UDP input responds by transmitting a pulse.
RECEIVED DATA ERROR COMMAND RECOGNITION
For error recognition, variables can be specified which can make simplify the resolution process.
| Variable | Description |
| \v | Using the variable\v, the virtual UDP input can take on the value given by the UDP sender |
| \1 | Byte 1 (lowest) |
| \2 | Byte 2 |
| \3 | Byte 3 |
| \4 | Byte 4 |
| \x | This variable identifies a dynamic Hex value |
| \\ | \, |
| \. | Any sign |
| \t | Tab (0x09) |
| \b | 0x0d |
| \r | 0x0a |
| \d | 0-9 |
| \m | A-Z, a-z, 0-9 |
| \a | A-Z, a-z |
SEND UDP COMMANDS USING THE MINISERVER
How to send any UDP commands with the Miniserver using a virtual output.
ENTER THE ADDRESS
To allow UDP commands, type in the following address and port information:
/dev/udp/192.168.1.10/7000 , and enable ‘close connection after sending’.
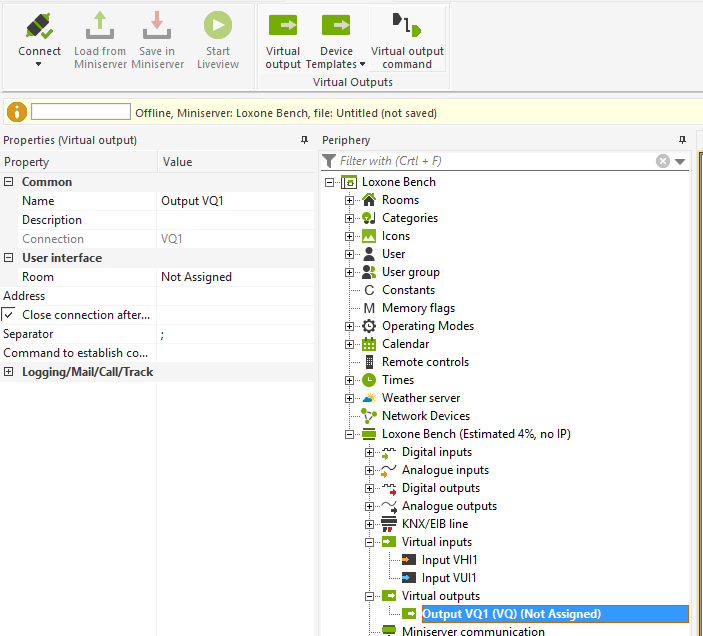
INSERT VIRTUAL COMMANDS
In addition to the virtual output connector, virtual commands must also be added and stored. To do this, click on ‘Virtual I/O’ in Periphery, then click on ‘virtual output command’ in the Context tab. The virtual command is now listed in the Periphery window under the virtual outputs.
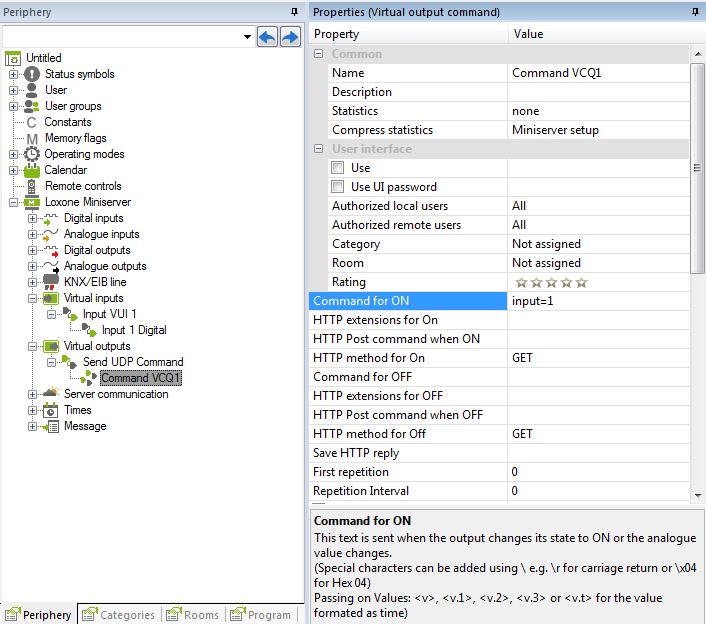
ENTER VIRTUAL COMMANDS
Highlight the virtual command in the Periphery window and enter the desired command in ‘Command if ON’ or ‘Command if OFF’.
![]() The command found in the field ‘Command if ON’ will be sent when a pulse arrives at the virtual command. The command in the field ‘Command if OFF’ is sent when the pulse terminates. If no command is entered, no command is sent.
The command found in the field ‘Command if ON’ will be sent when a pulse arrives at the virtual command. The command in the field ‘Command if OFF’ is sent when the pulse terminates. If no command is entered, no command is sent.
Any message can be sent as long as it is recognised by the recipient device. If not, the packet will not be accepted.