INTRODUCTION
The commissioning mode allows the system to be tested via the user interface to do a relay and input check.
A special file is created specific to the hardware in the system and this is then saved in the Miniserver automatically. After completion of the commissioning mode a test report is created.
USING THE COMMISSIONING MODE
The commissioning mode is a feature in Loxone Config from version 5 onwards. It can be used to very easily test all the inputs and outputs in an installation from the user interface. At the end of the commissioning mode a test report is generated to give you an overview of all the circuits tested.
The Miniserver can be running either a blank file or your program. The commissioning mode automatically saves the file for testing on the Miniserver and then after the mode has finished saves your original file back to the Miniserver.
STEP 1: START THE COMMISSIONING MODE
The first thing to do is open Loxone Config and then connect to the Miniserver you wish to commission. Then click on the Maintenance tab and then click the commissioning mode button, it will highlight to show it is active.

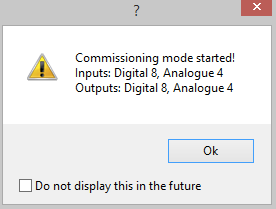
When you have clicked this a popup window will appear to confirm starting the commissioning mode, select OK to proceed.

STEP 2: OVERVIEW
The commissioning mode will use the Loxone Link to see which extensions are connected to the Miniserver and then give you an overview of the inputs and outputs available in the system.
STEP 3: TEST WITH THE USER INTERFACE
The commissioning mode will now save the commissioning file on to the Miniserver. A backup of the file the Miniserver is running is kept. You can now use the user interface to test all of the inputs and outputs.
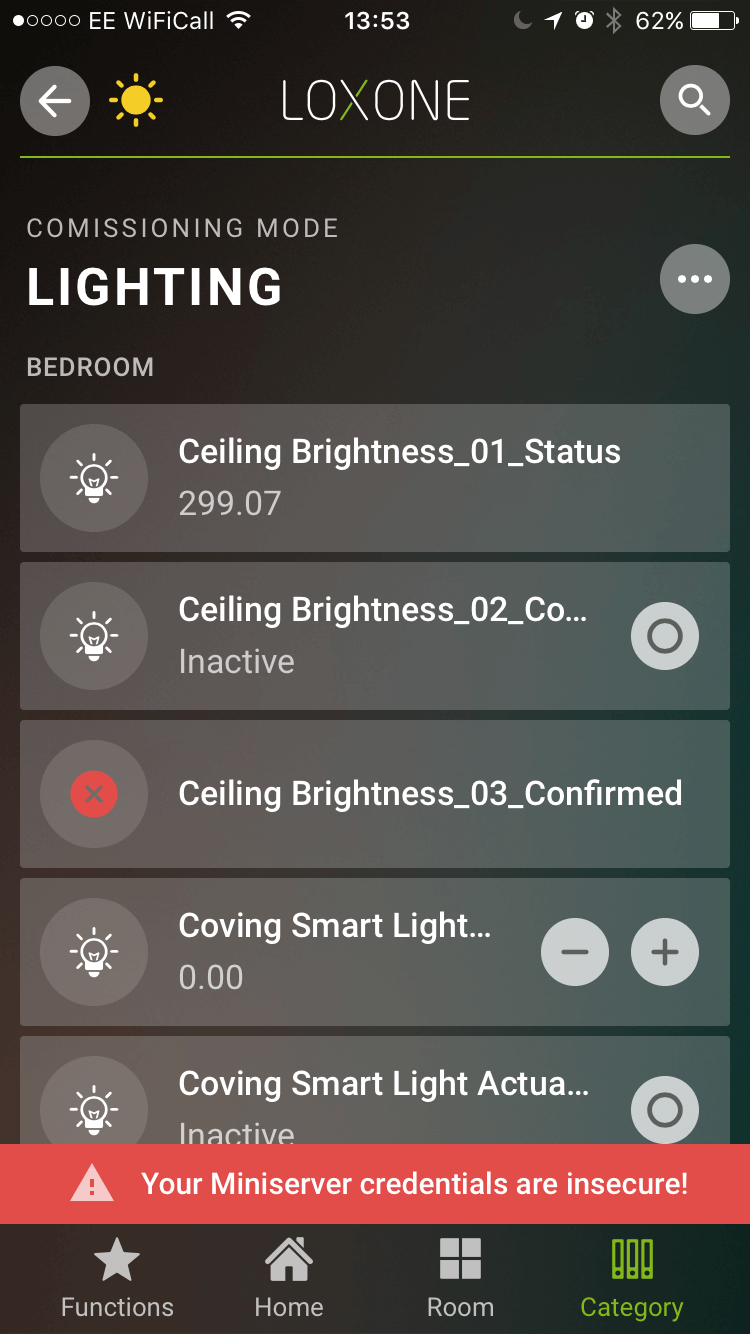
There are two sections to the commissioning mode user interface:
Commissioning overview
This section shows you an overview of all the available inputs and outputs and those that have been confirmed. You can also finish and restart the commissioning. The results are shown in a tracker and the current state of the commissioning is also shown (if you are working on analogue inputs for example it will reflect how many are confirmed).
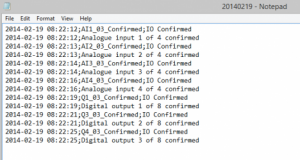
The tracker information is the test report that is generated as a .txt file at the end of the commissioning from Loxone Config.
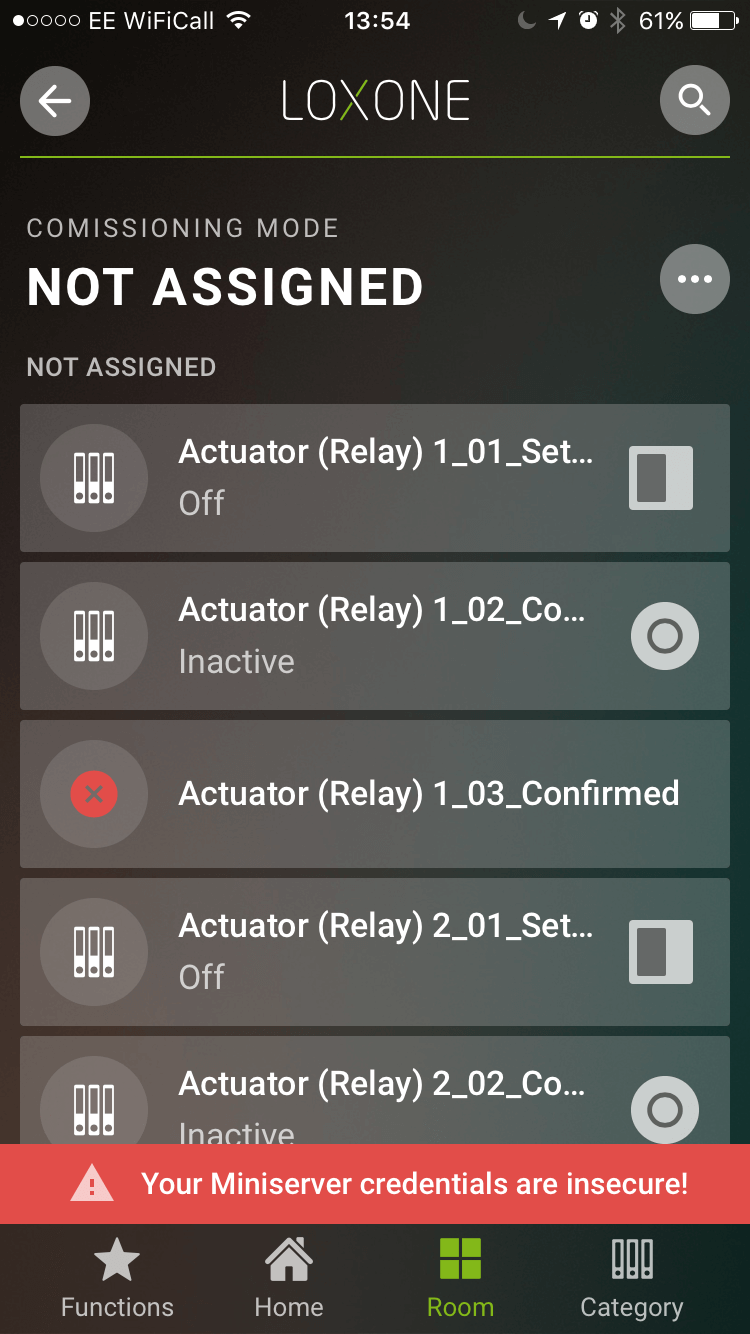
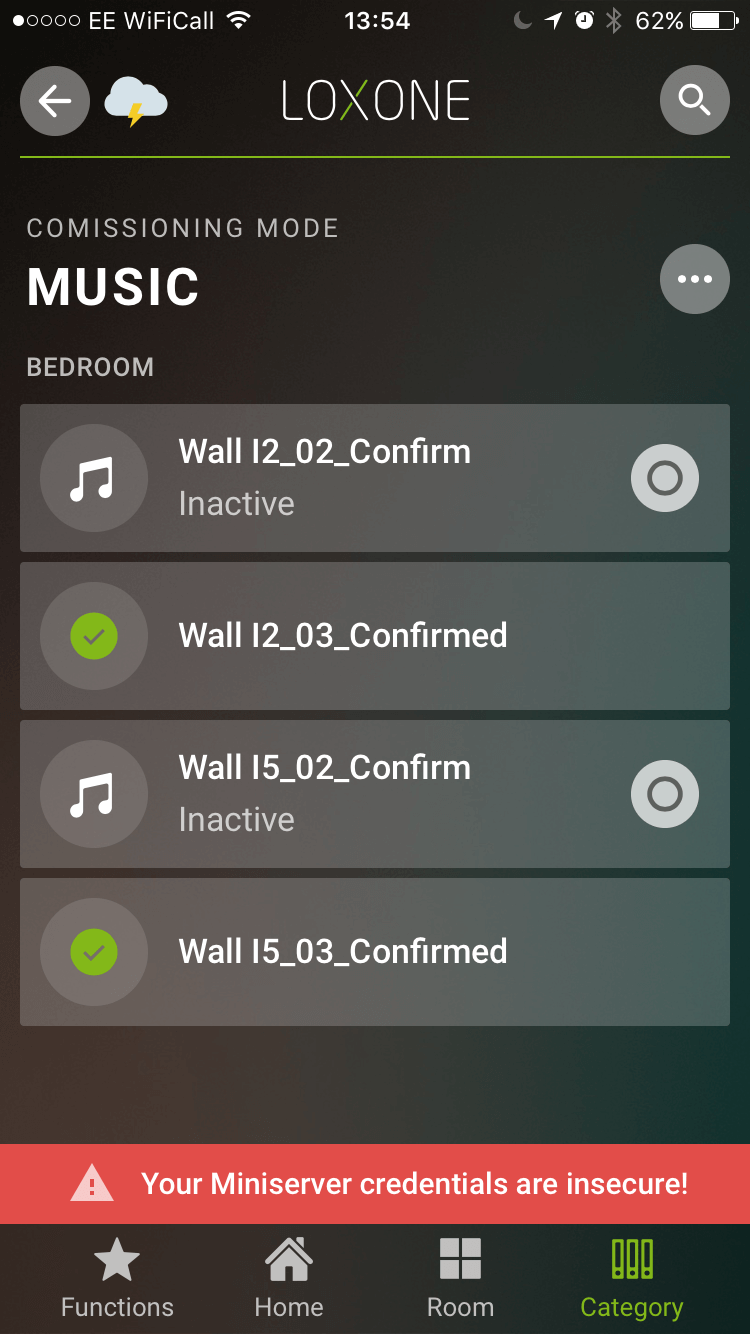
Input/Output Testing
This section has all the available inputs and outputs listed with a confirm button under each input or output.
Inputs will show their value so you can see that they are working. Use the Confirm pushbutton to confirm an input, a green tick will display once the input is confirmed.
All outputs have either a slider (if analogue) or a switch (if digital) so you can test each light circuit or valve actuator for example. Once again like with the inputs you use the Confirm pusbutton to confirm an output is working and then the green tick will display once this output is confirmed.
The confirmation pushbuttons is the information that is shown in the results.
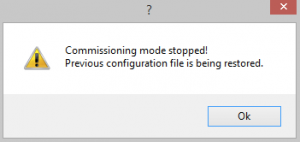
STEP 4: END THE COMMISSIONING MODE
Once you have finished testing all the inputs and outputs you need to end the commissioning mode. To do this in Loxone Config just click on Commissioning mode again, it will no longer be highlighted and a window will popup to confirm the mode is finished.
STEP 5: RESULTS
When you finish the commissioning mode a text file will pop up (you may get a Windows pop up asking you how you would like to open it first). This report will contain all the confirmed input and output information.