
How To Lay Out Your Smart Home Distribution Board
Last week we talked about general tips for wiring your Loxone system, (you can find the blog here) but today we’re taking a closer look at the inside of your distribution board and how to keep all those cables neat, tidy and safe. Please note that any wiring should only be carried out by trained and qualified individuals and needs to be done in accordance with local regulations!
Circuit Protection
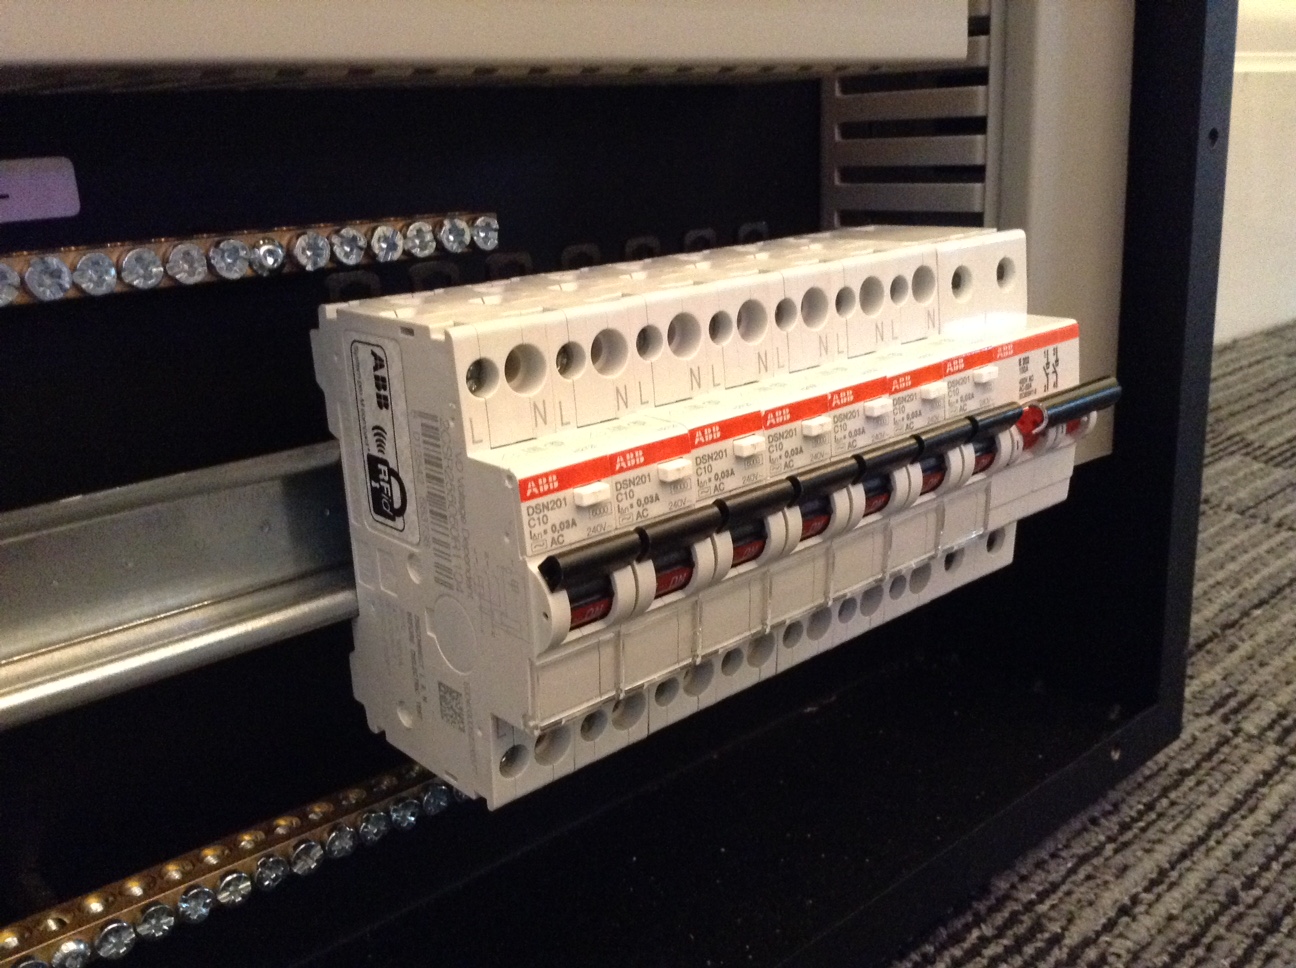
If you have a sufficiently sized enclosure, then it makes sense to have the circuit protection as part of the same enclosure that houses your Miniserver and Extensions. If you’re using an enclosure such as those manufactured by Future Automation then we’d recommend that you keep your main isolation switch and your RCDs and MCBs (or your RCBOs) on the right hand side of the bottom rail. This is also where you’ll find the earth and neutral bar in the Future Automation enclosures.
24V Power Supply
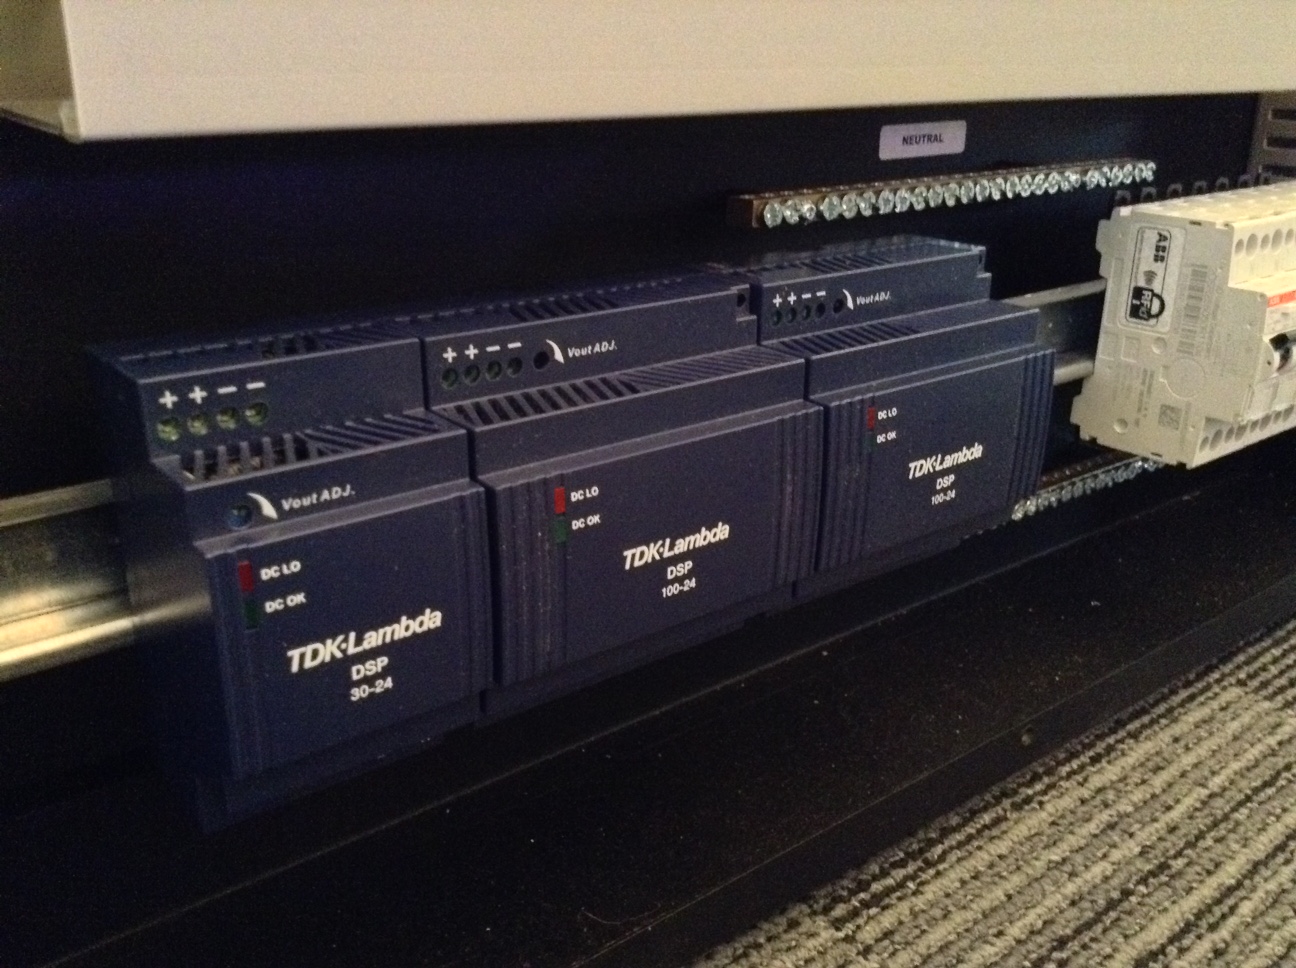
Since you’ve quite a bit of space on the bottom rail of the enclosure, we recommend that you use the left hand side of this rail for your 24V power supplies. We suggest that a dedicated RCBO is used to feed the power supplies, rather than combining these with other circuits.
If you are installing LED strips, we recommend you use 24V fused terminals to ensure individual LED drivers are protected on the 24V side.
Cable Routing
It is not just good practice to keep your low voltage cables and mains cables physically separate wherever possible, but there are also regulations that you need to adhere to. For this reason we recommend that you feed the cables coming from throughout the house into the top of your enclosure, keeping the CAT7 cables to the left hand side, and all mains voltage cable to the right hand side. You can then connect these neatly to terminals placed on the top rail of the enclosure.
From your terminals on the top row you can then route the cables to the Loxone Equipment that is fitted on the other DIN rails in the enclosure. Inside a panel it is not easy to keep your cables segregated and due to space restrictions also not always practical. To ensure that your installation is still safe and complies with regulations, you should use Panel Wire, which is also referred to as Trirated Cable. In the UK this is a cable that conforms to BS6231. In addition to the correctly rated cable you should ensure that you use harmonised colours and label your cables.
Termination
Planning how to lay out your terminals and having enough space for them is key for a neat and tidy installation that is easily maintainable. We have put a few recommendations together to help you with your planning.
Sensors & Low Voltage
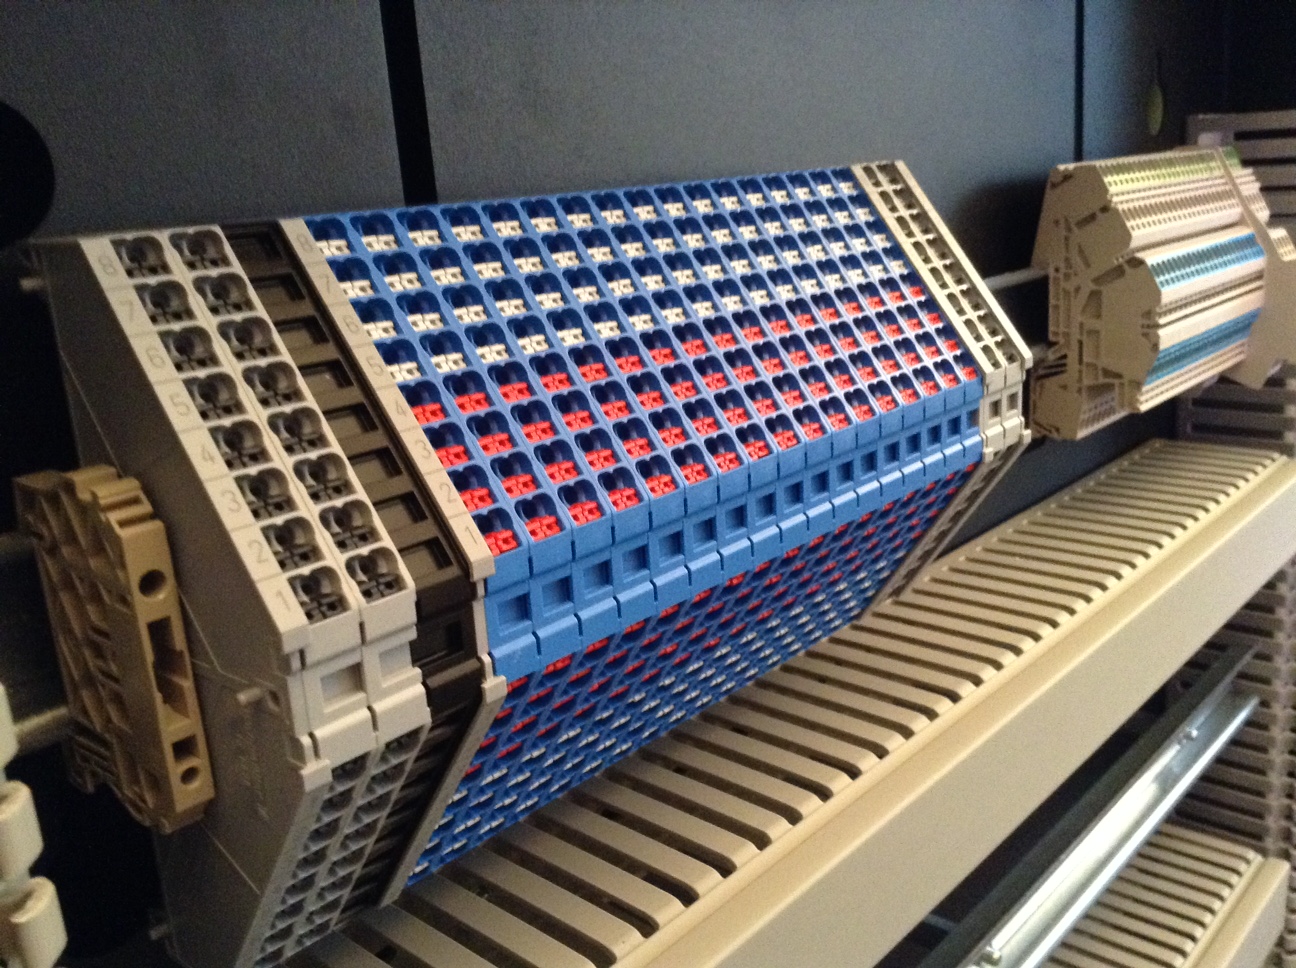
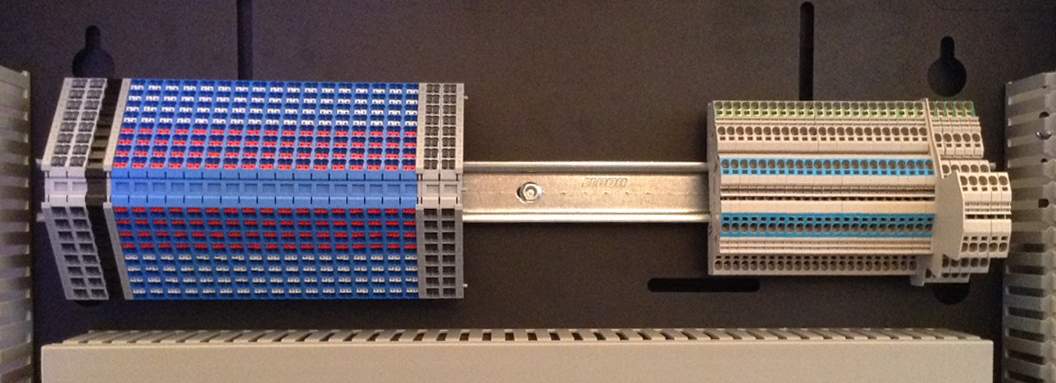
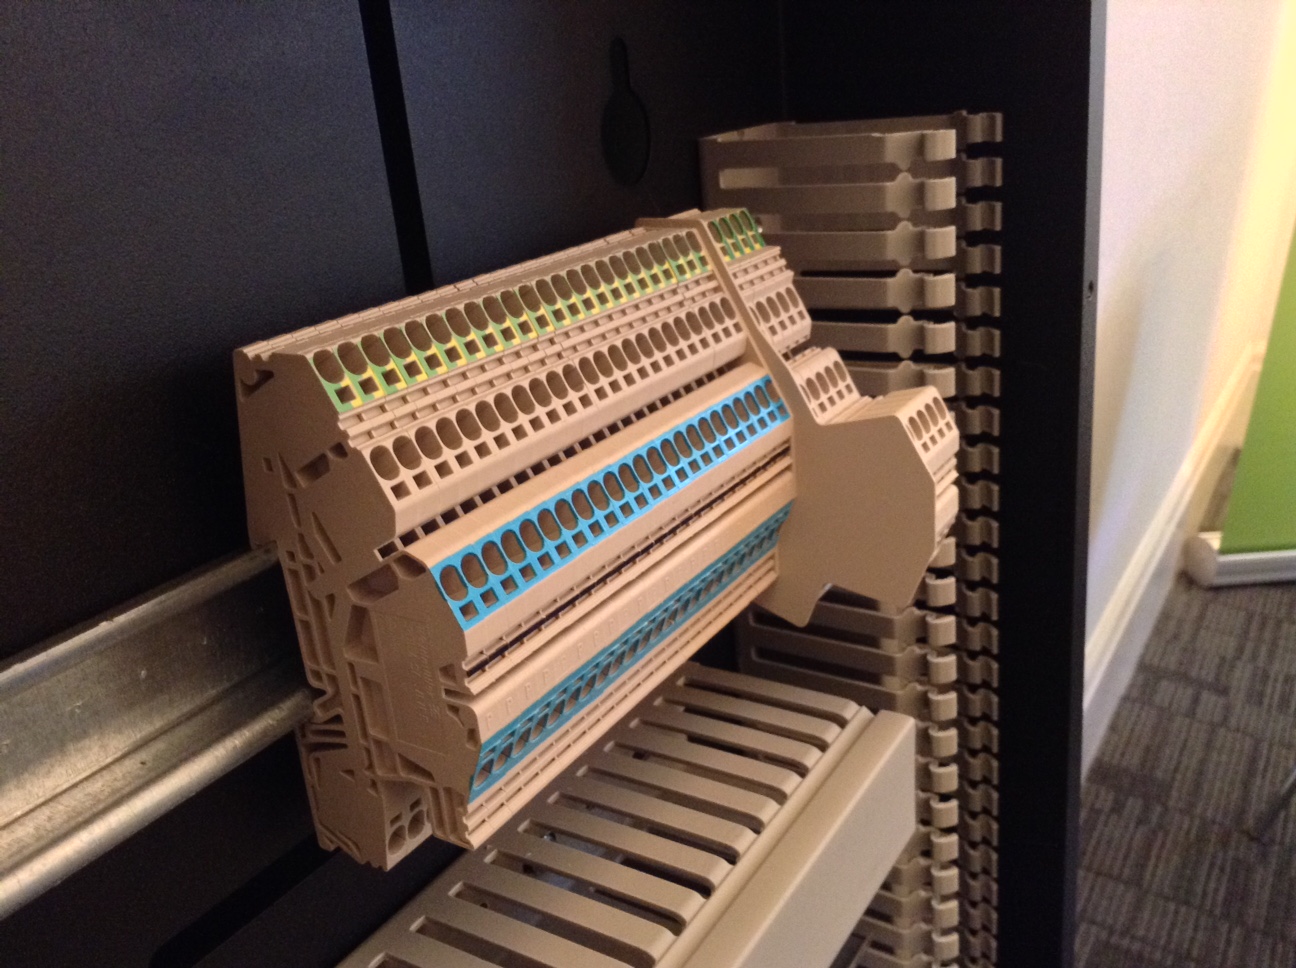
From the left hand side, first up is a pair of 8 Layer Interconnected Terminal Blocks – which we suggest you use for power distribution – connect your 24V and ground into one slot on each of the terminals and you have 31 slots left on each block for distributing the power.
Next to your 8 Layer Interconnected Terminal Blocks, we suggest a label holder to help you keep track of your wires.
Now it’s time to clip on your 8 Layer Separated Terminal Blocks. Use these for your low voltage inputs and outputs. This includes your inputs for sensors such as PIRs, window contacts and light switches and also outputs such as proportional radiator valves.
If you’re installing a 1-Wire Extension, you’ll want to add another pair of 8 Layer Interconnected Terminal Blocks next. Wire the data and ground terminals from the 1-Wire Extension into the 8 Layer Interconnected Terminal Block so that you can use these as your sensor distribution centre.
To recap: On the left hand side of the top DIN rail, your order should be: power distribution, low voltage inputs and outputs and then 1-Wire (if applicable).
Mains Voltage
Let’s move over to the right hand side. If you remember, this is where we’ll be dealing with mains voltage, so it’s especially important to be aware of what you’re doing. Always use end plates as you go along and work with due diligence.
We recommend Twin & Earth terminal blocks for each and every light circuit and 3-Core & Earth terminal blocks wherever you’re driving motors -like blinds, curtains, or garage doors, for instance.
Tip: Consider using bus bars to interlink the neutrals of your terminal blocks, and help cut down on unnecessary wiring.
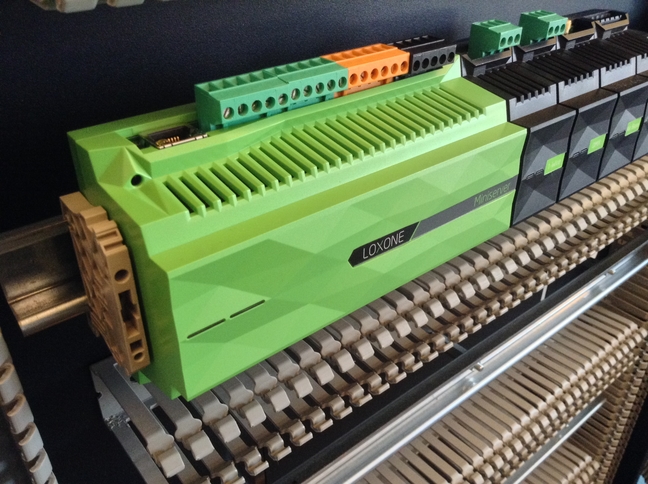
Loxone Components
On the middle rails, you can then nicely clip all of your Loxone equipment, starting with your Miniserver followed by all of the Extensions you may have as part of your installation.
Here’s a quick overview of all the terminal blocks currently available in our webshop, for the Loxone Smart Home
In cooperation with Weidmüller, a household name for electrical components of all kinds, we’ve compiled an assortment of terminal blocks. These ones are perfect for the requirements of setting up distribution boards with Loxone equipment.
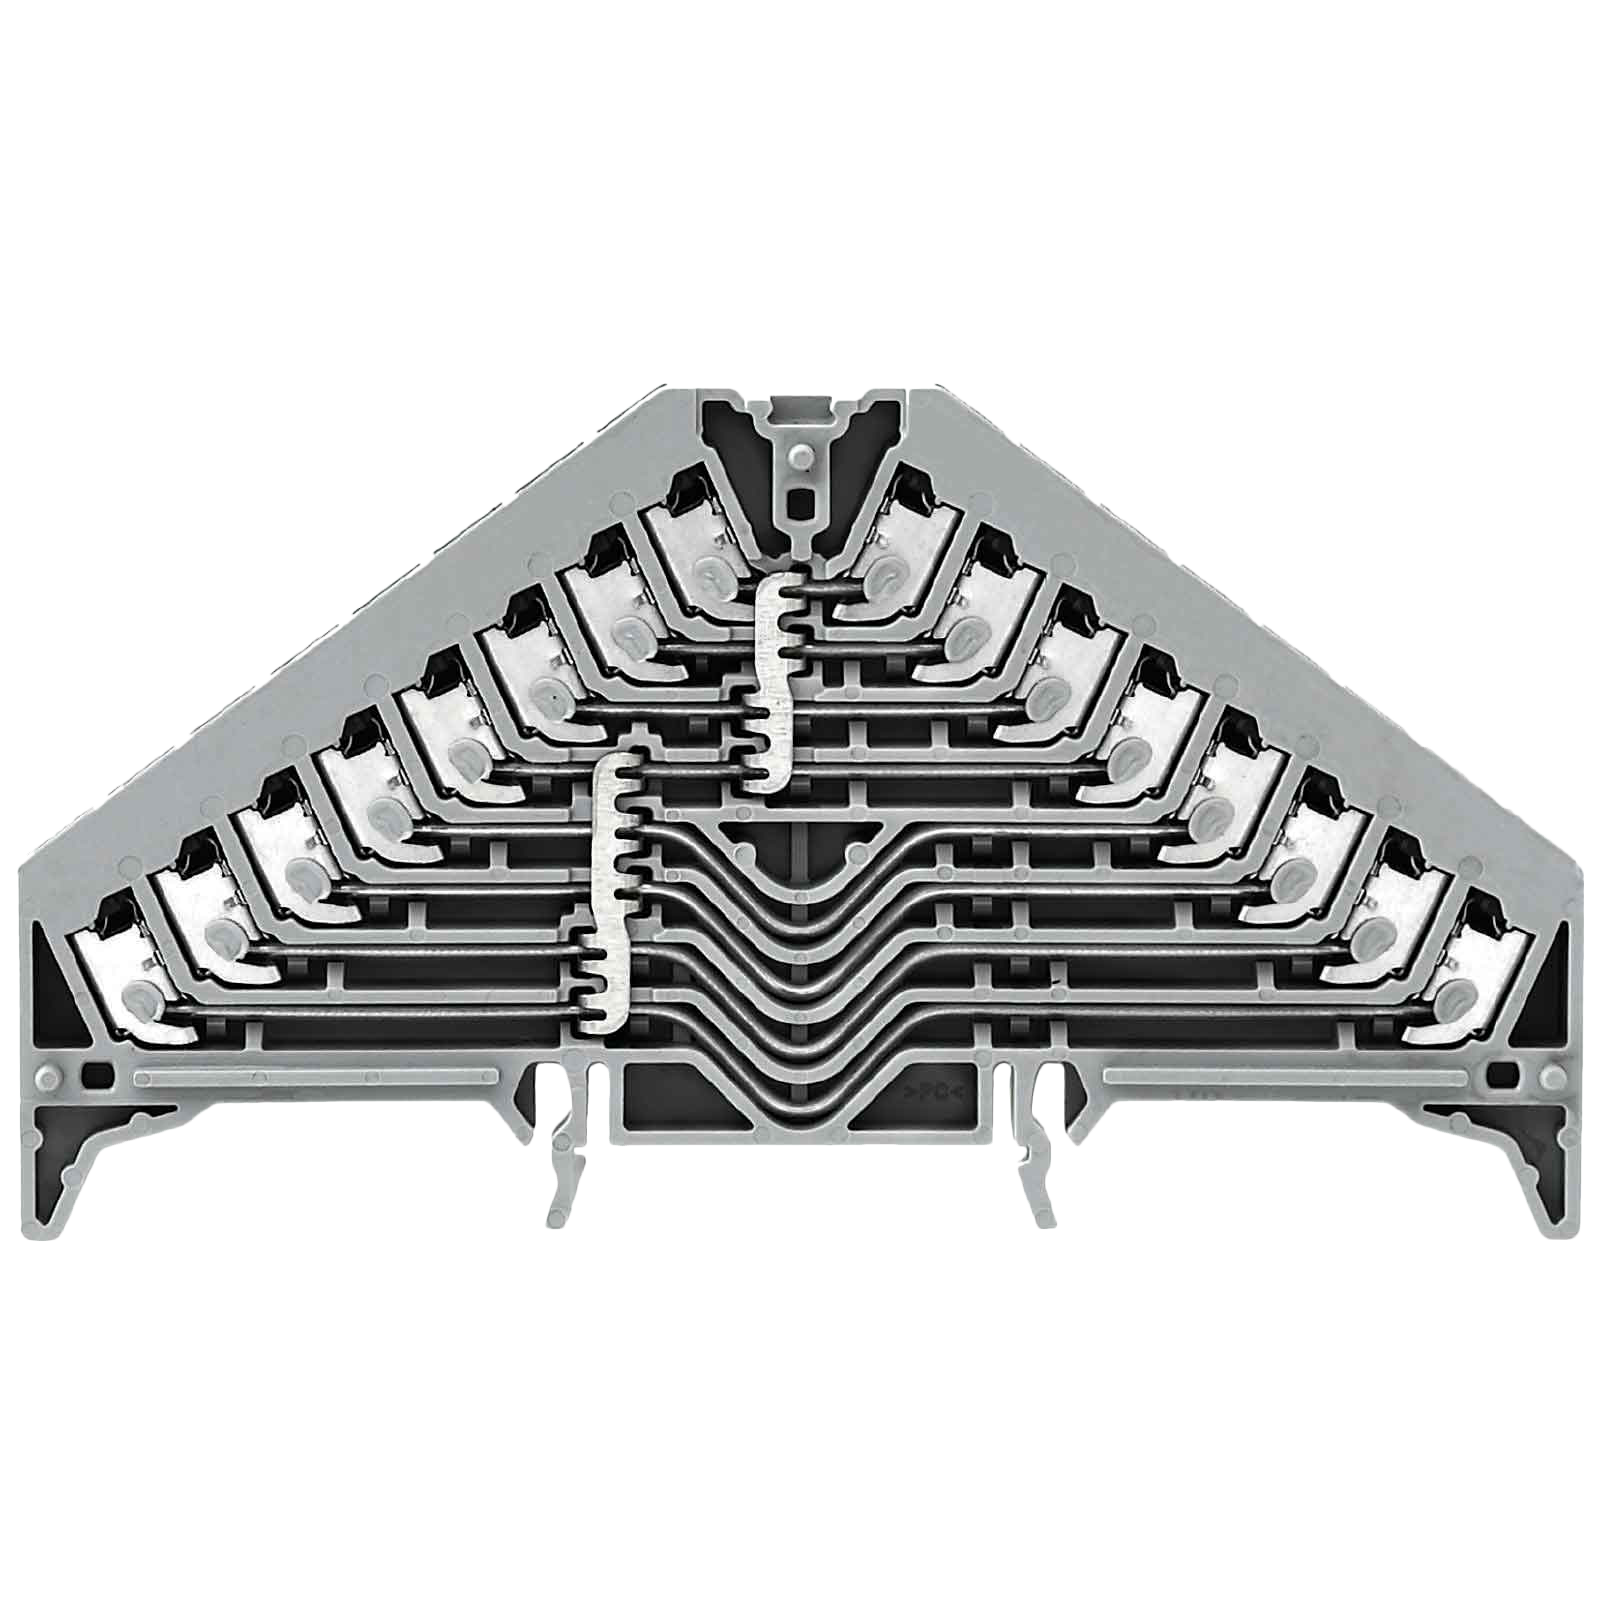
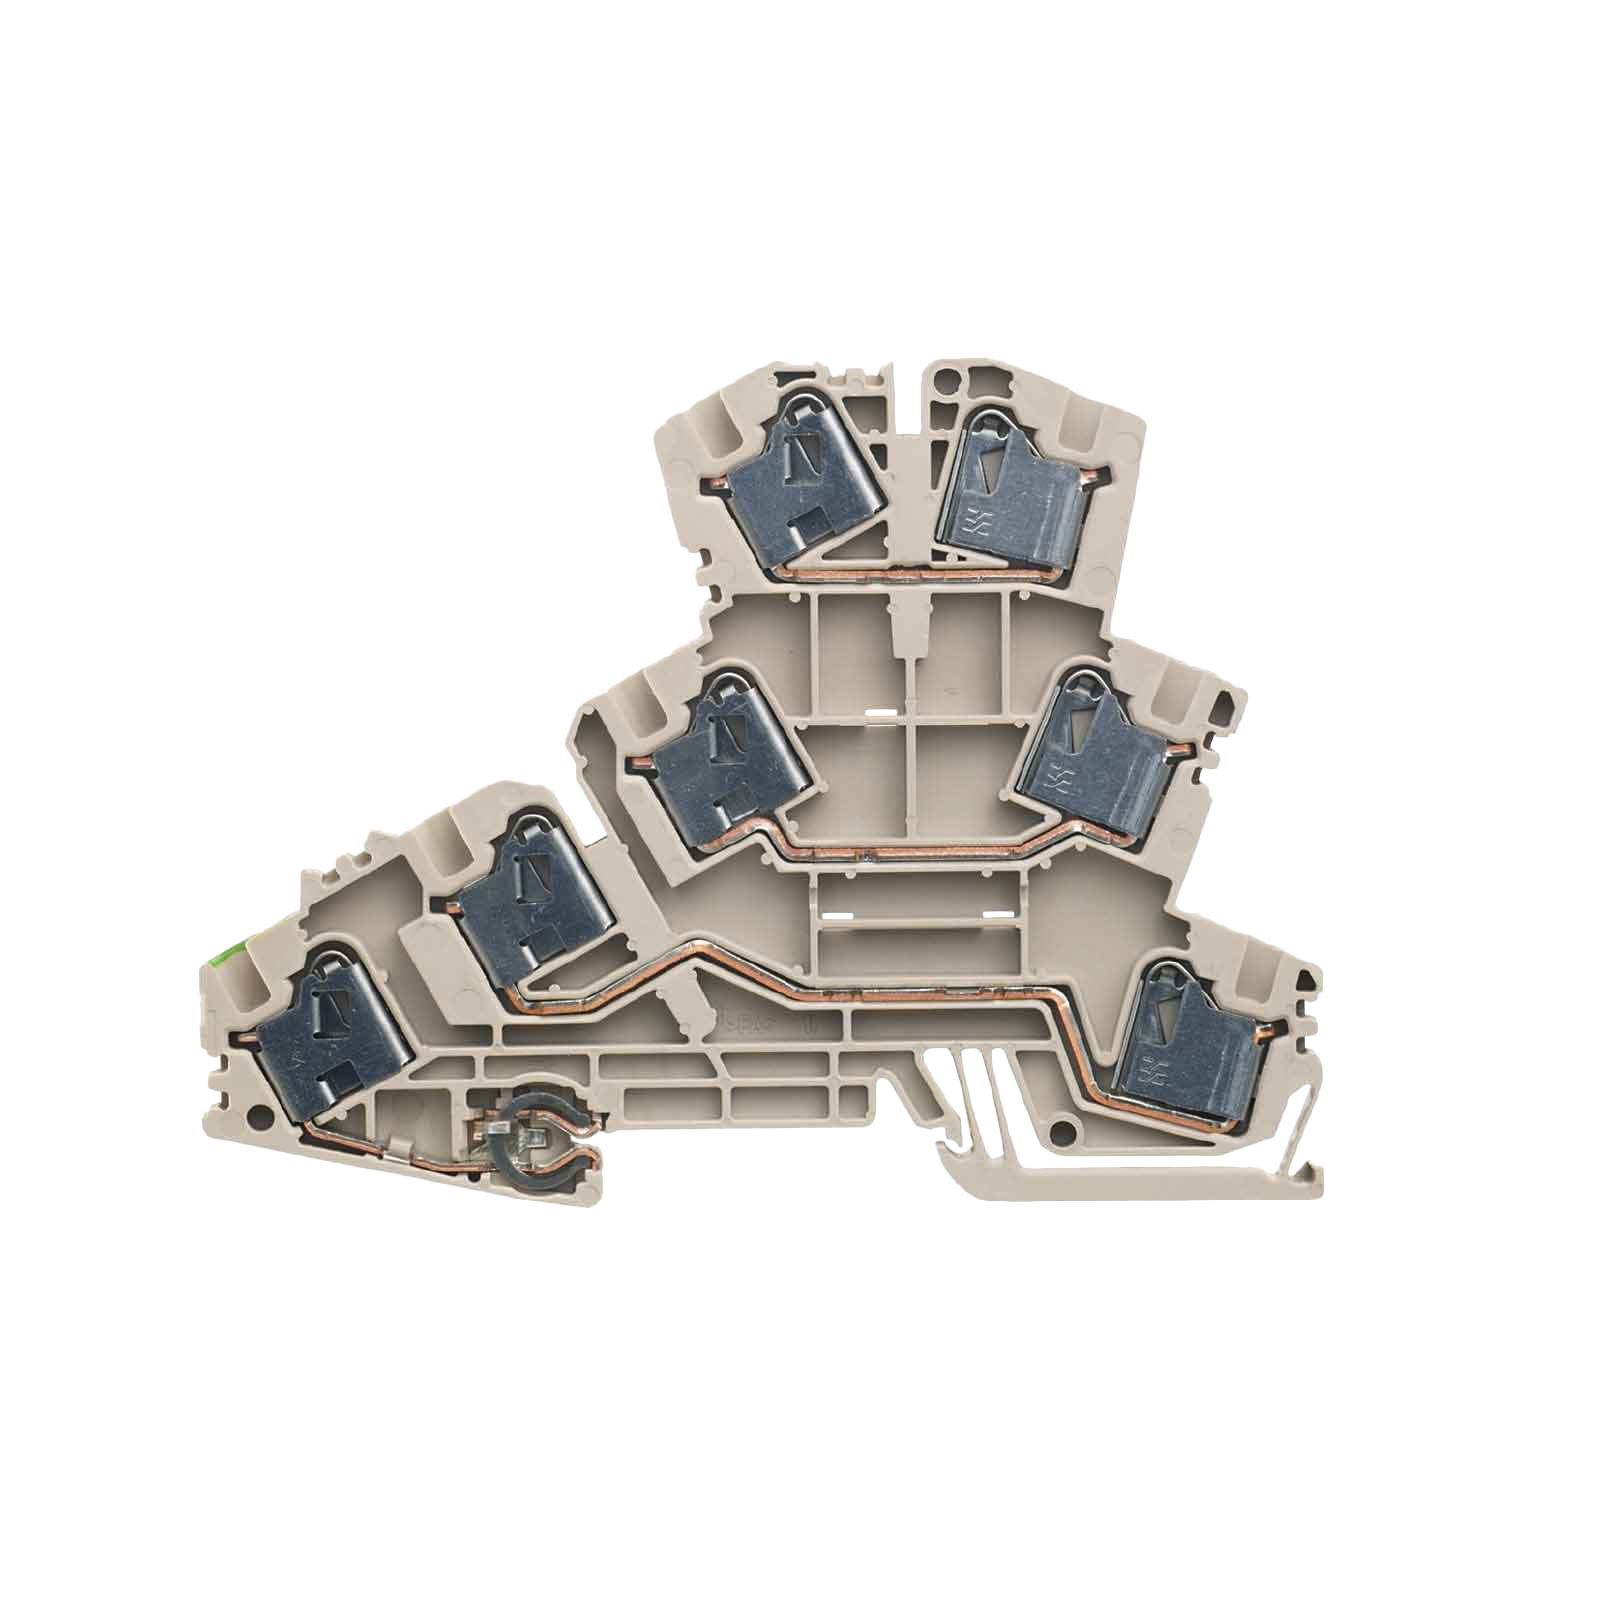
Push In Terminal Block 8×4 Interconnected
Perfect for 24V distribution and 1-Wire sensor wires. The Terminal block offers a total of 32 connections, which are interconnected.
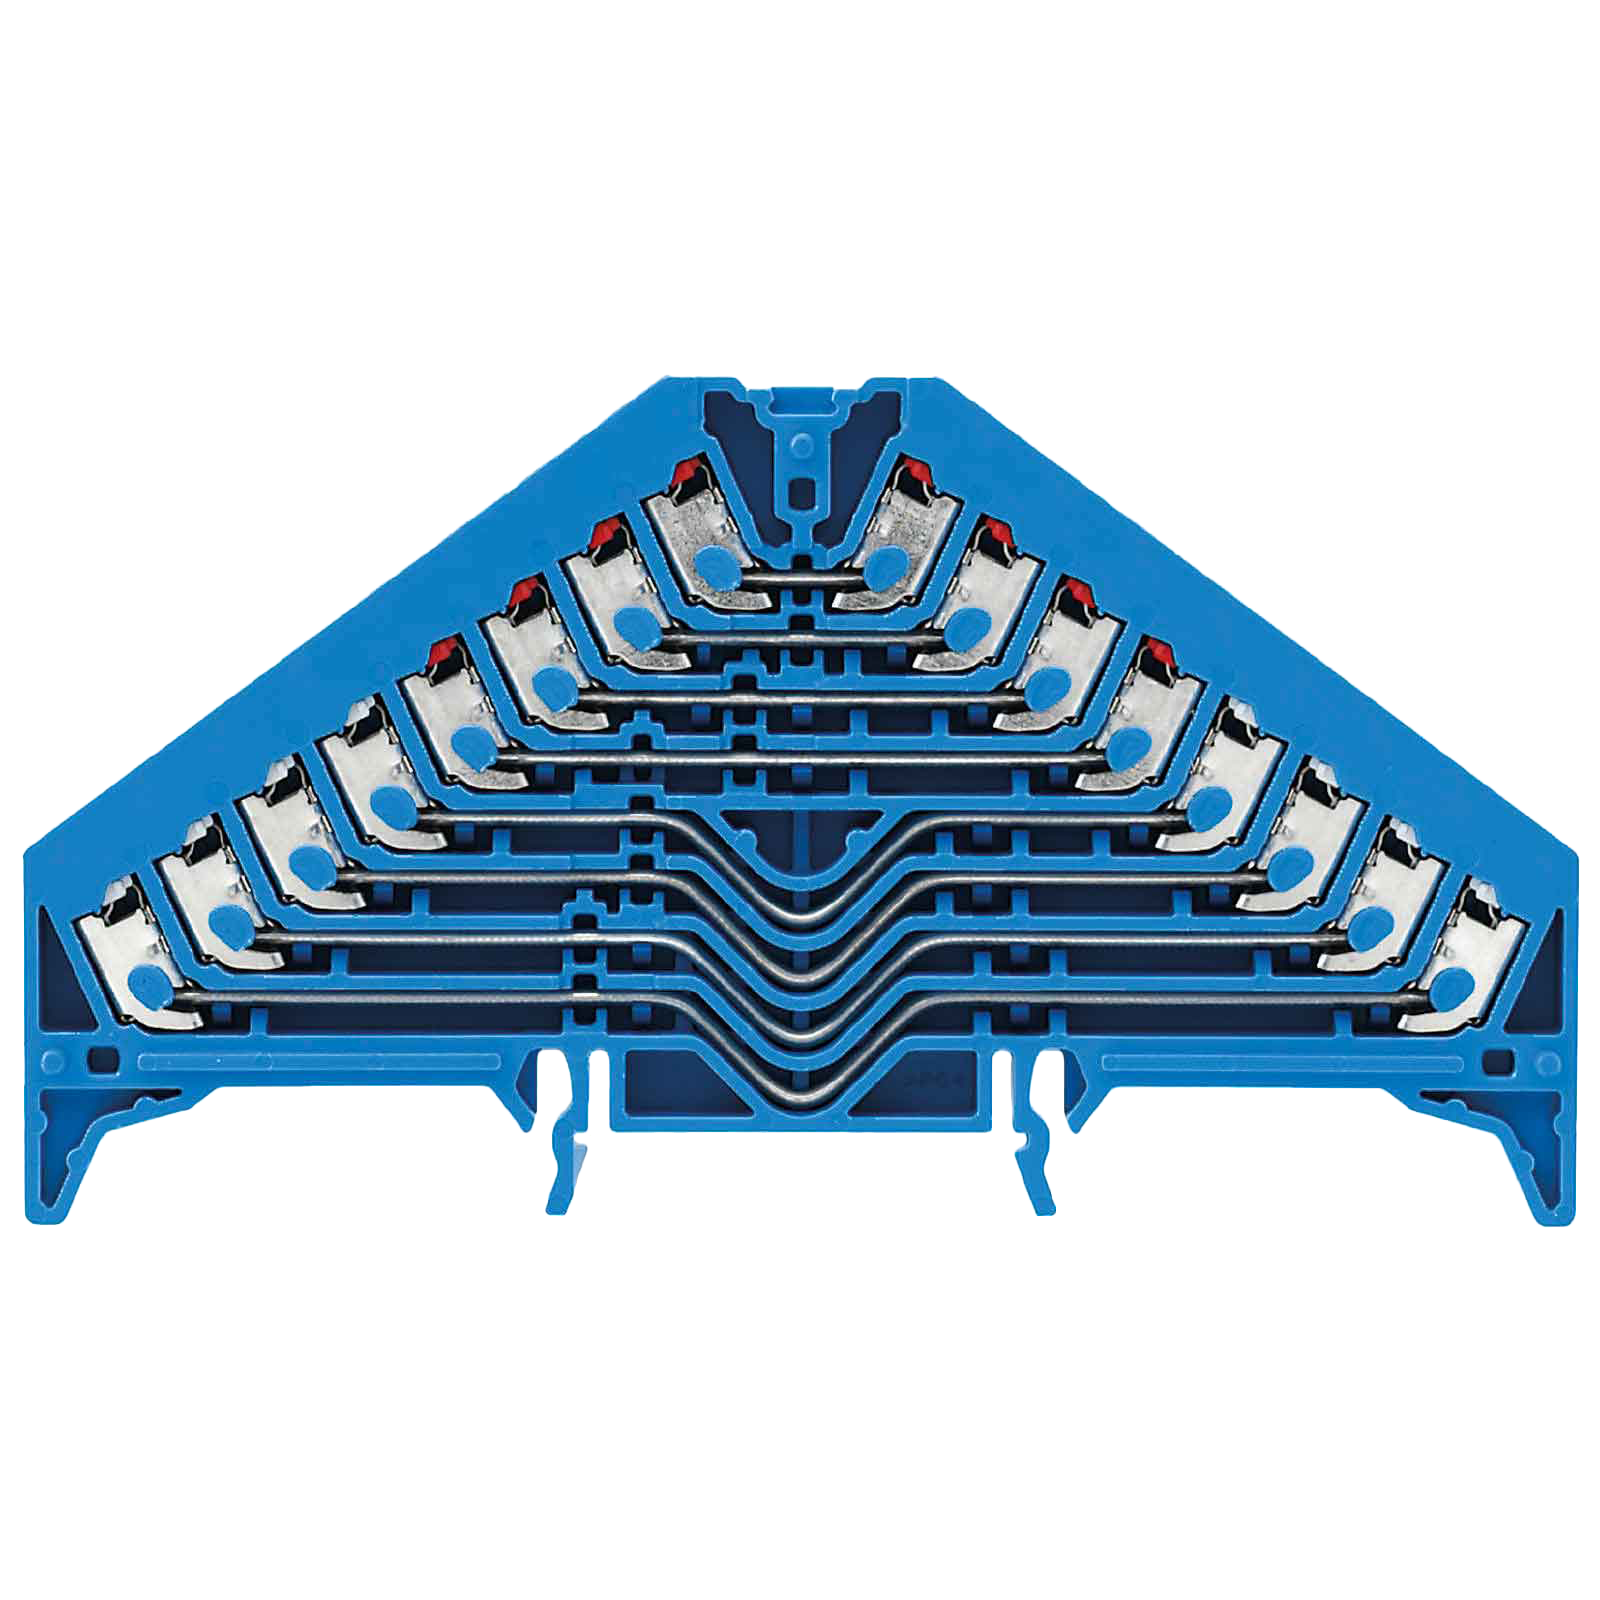
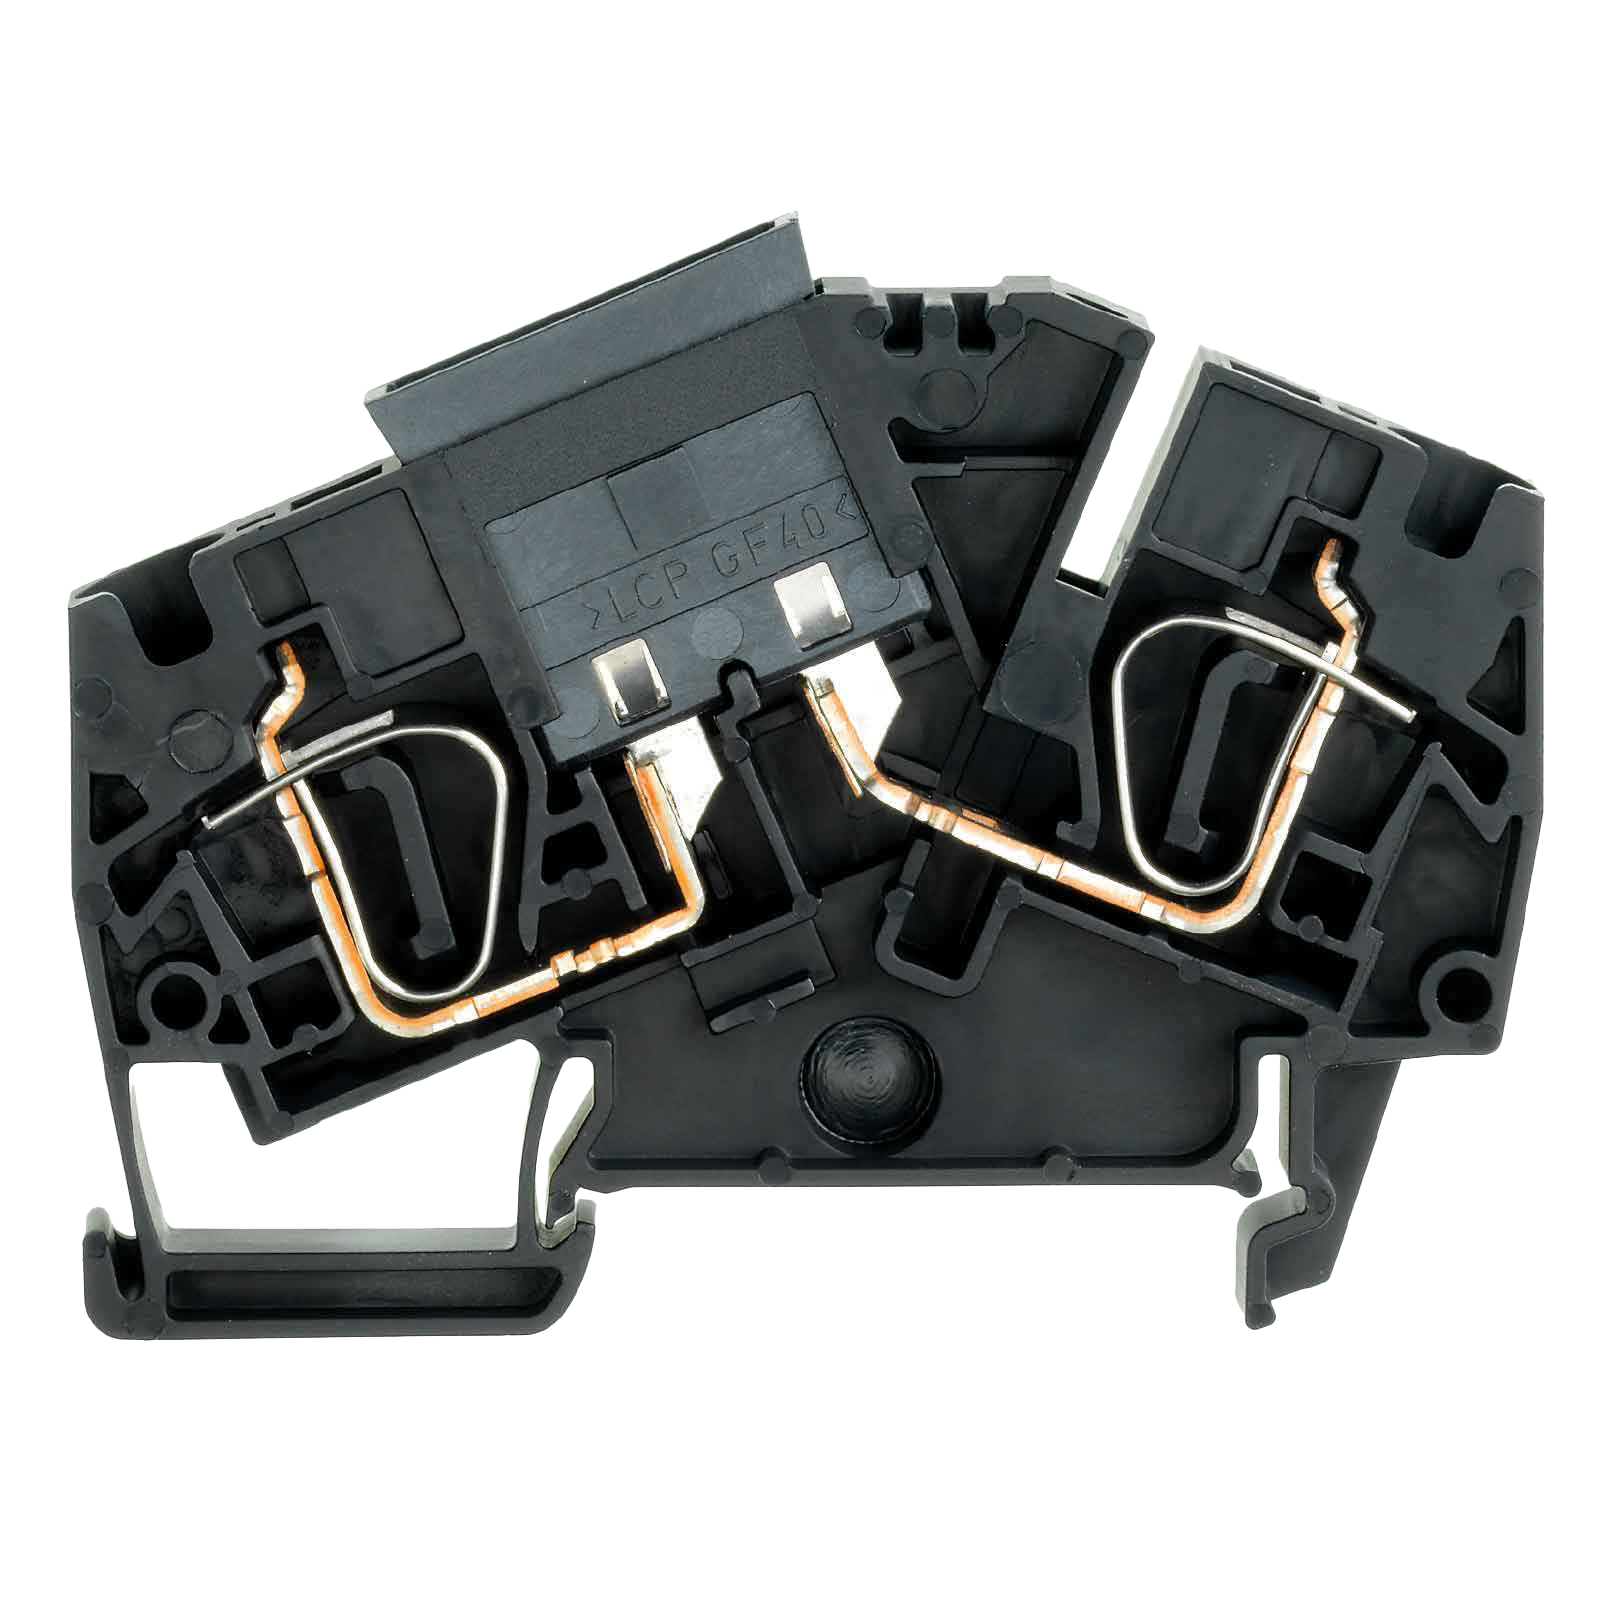
Push In Terminal Block 8×4 Separated
This Terminal Block is mainly used for wiring of push buttons and sensors. It’s perfectly suited for Loxone CAT 7 cable.
Push In Terminal Block 3 + Earth
Both Terminal Blocks can be used for the connection of consumers of all kinds – lighting, sockets, blinds, fans and more.
Push In Fused Terminal Block
For fuse protection of wires with matching fuses in different ampages (2A, 5A, 10A).
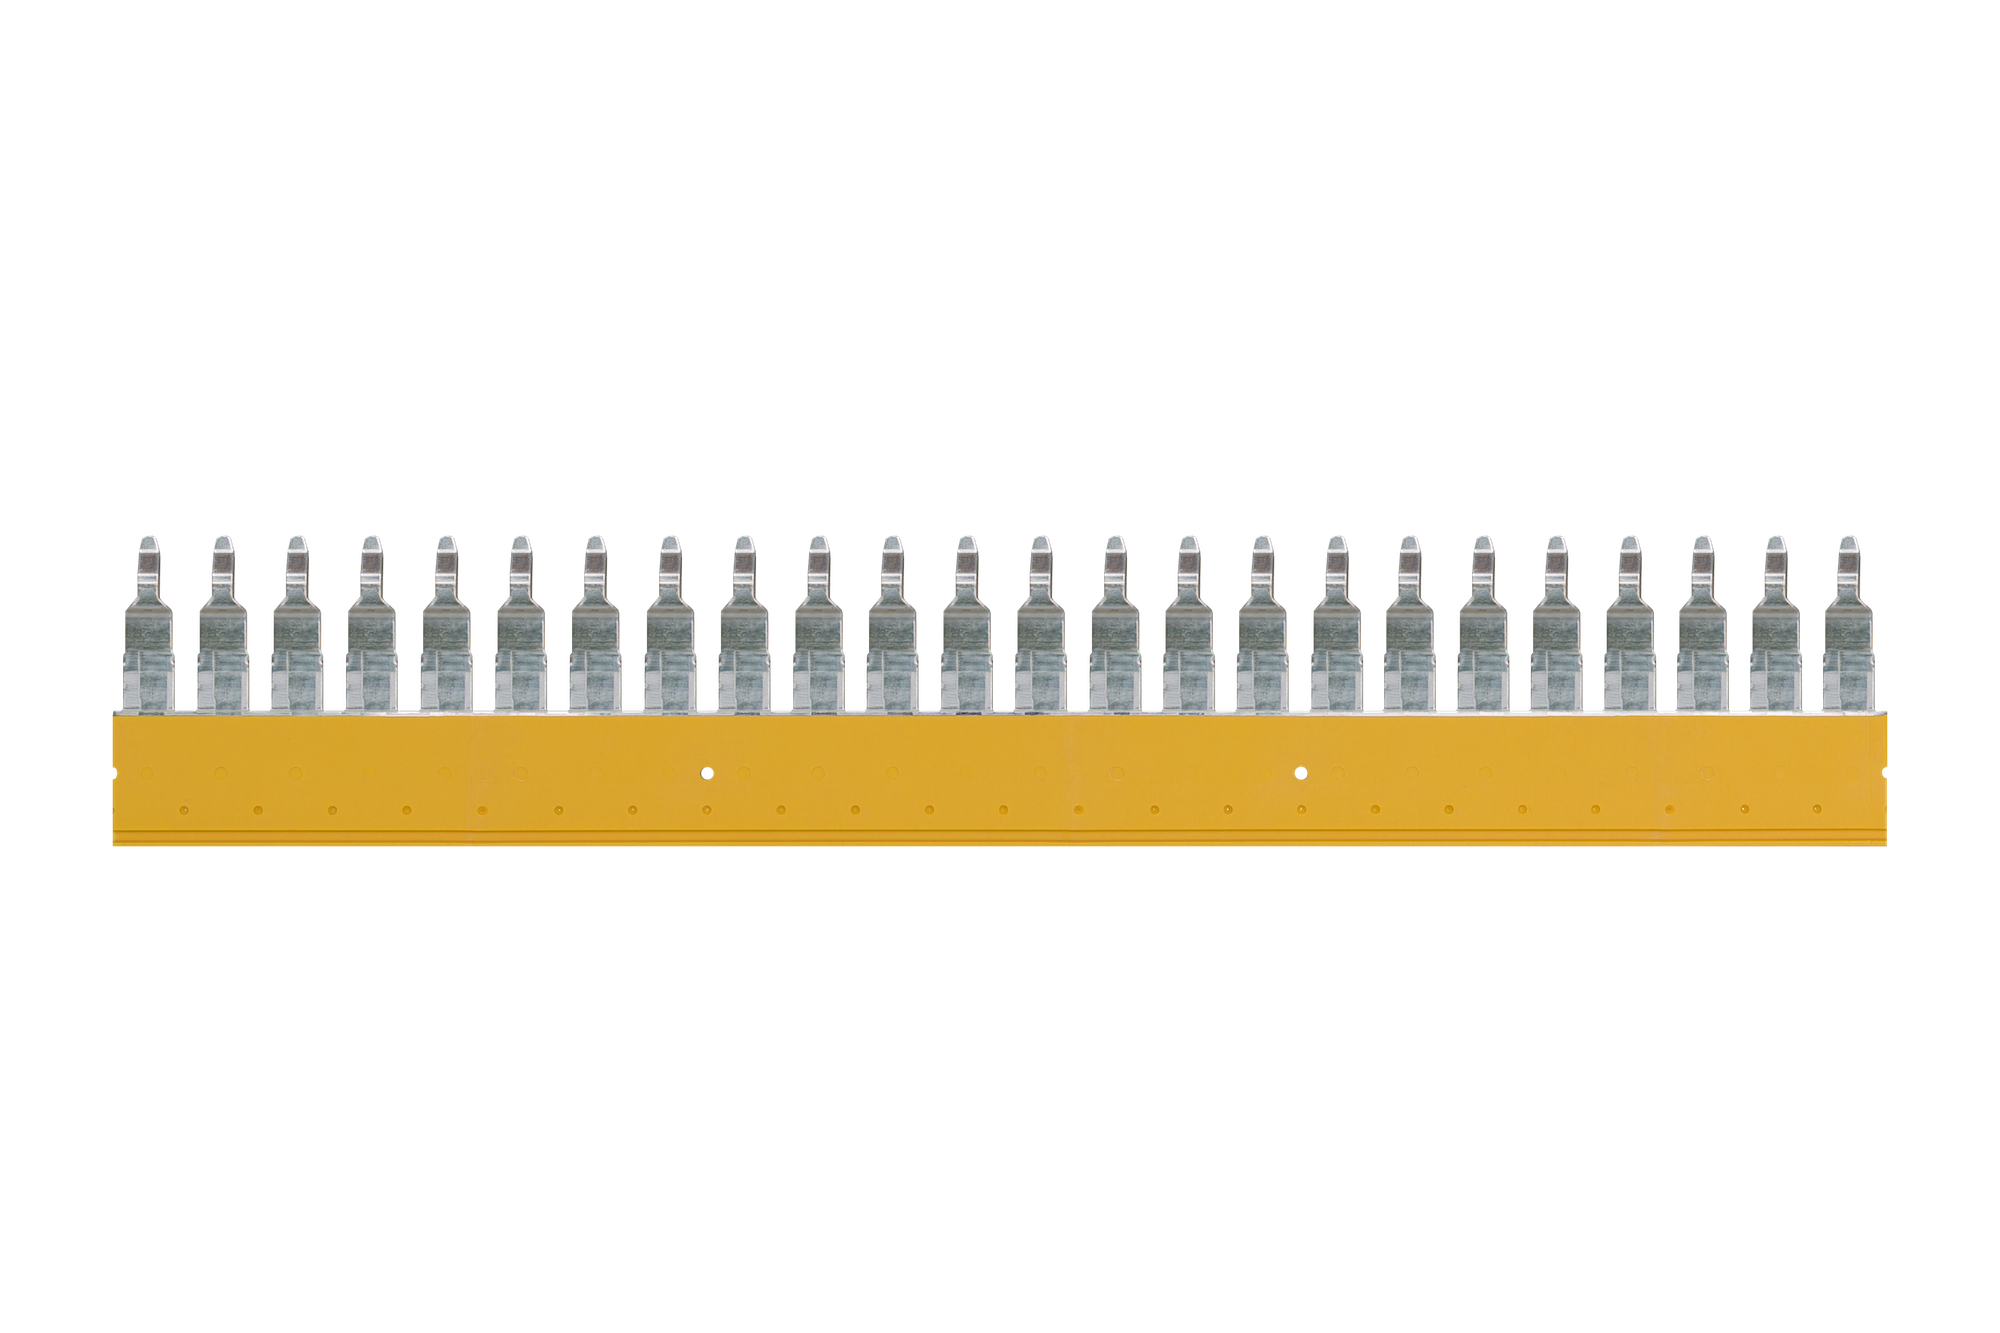
Cross Connector for Fused Terminals
For interconnection of terminal blocks. Connects up to 24 terminals and can easily be cut down.
For more wiring tips, head over to our smart wiring page, or if you’d like to discuss your plans in more depth, why not book a free project consultation with us now?